I've never made terrain before. I've always shied away from it because it doesn't look easy to do, never mind easy to do well.
But Battlefront posted a great little article on how on the Stalin's Onslaught book. They also published it on their website here.
 http://www.flamesofwar.com/Default.aspx?tabid=110&art_id=1148&kb_cat_id=24
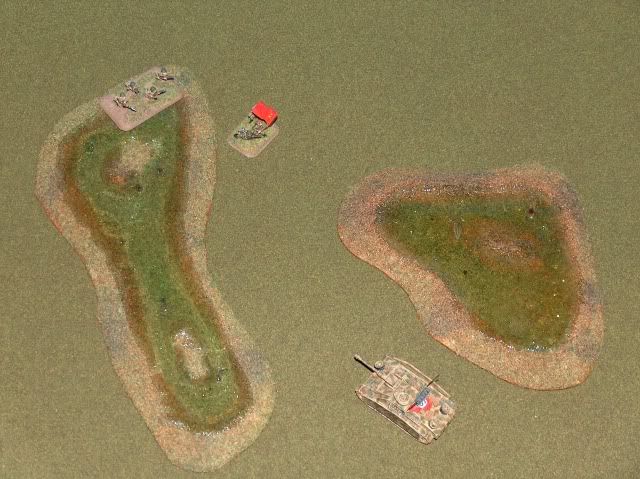
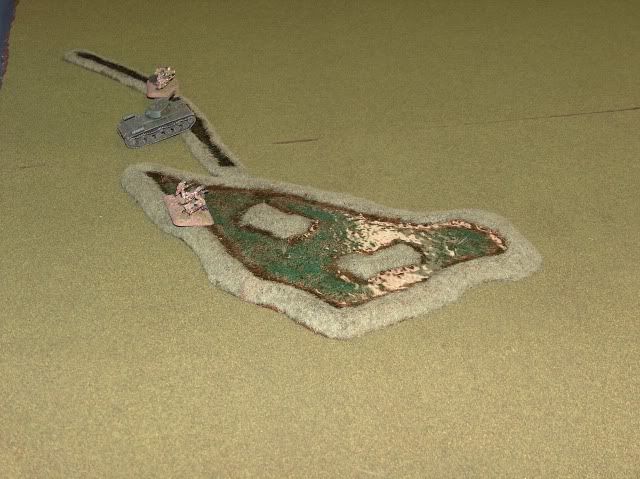
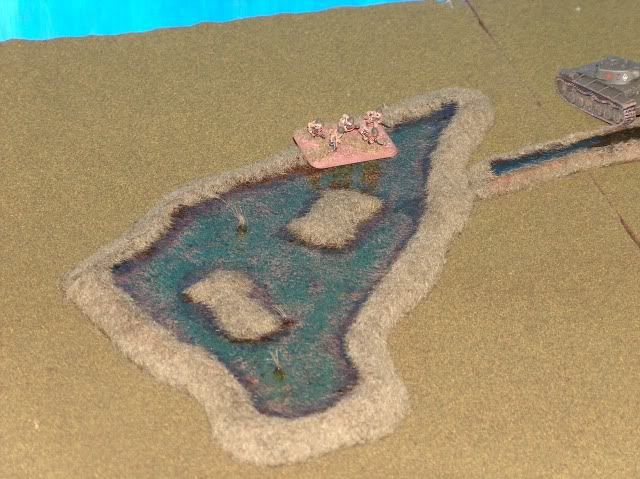
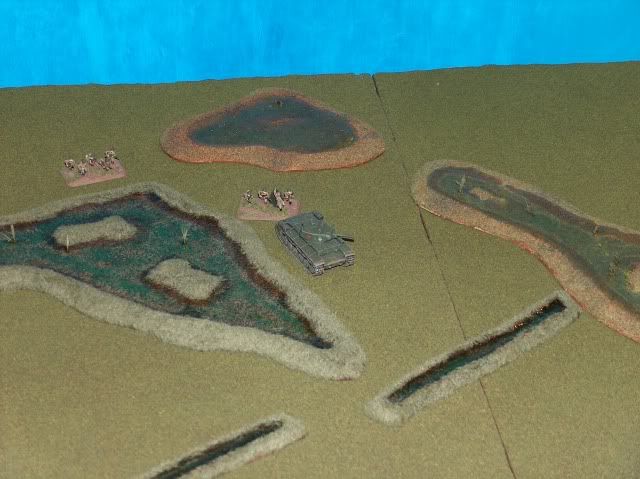
I have almost every piece of terrain I wanted for the Eastern Front except good marshes. So, I decided to give it a try. And I'd have to say they turned out pretty good. Far better then I've seen anything you can buy.
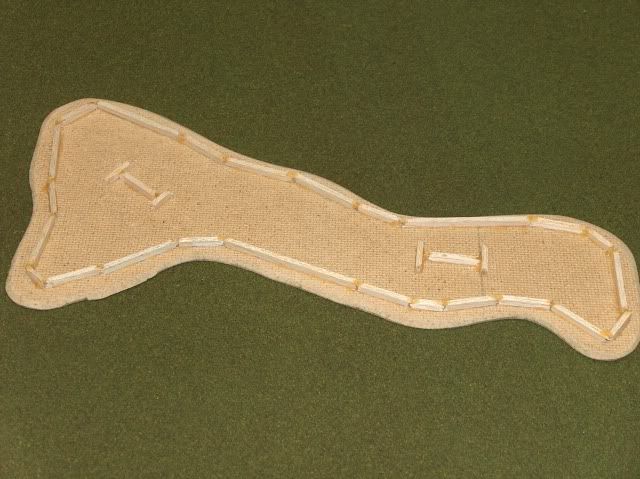
So, following the guide made by battlefront I cut out my pieces attached the balsa wood, puttied the edges and got them ready. Added some sand, some grass, and painted it up. It was now ready for the most exciting part....the water!
I've now made 2 batches of marshes with 2 different kinds of water, and i'll go through both.
The first, I bought a long long time ago from my Chainmail days when I was going to make some terrain for that. I never did get around to using it. This was part of my incentive to make these. I still had this stuff to use.

This first stuff comes as a solid. a whole bunch of clearish pebbles that you melt and then poor into the "cavity". Its then suppose to dry super fast and presto you have realistic looking water.
This stuff was very very difficult to work with. It was a pain in the ass to melt, it was an even more pain in the ass to poor it. I don't know if I heated it to much or what, but there were just crazy bubbles and it wasn't clear at all. It was almost as if it boiled.

I was very unhappy with the result. But then I came across something that said use a heatgun to remelt it and it would smooth it out. WELL, that was fantastic. I found a heat gun at Canadian Tire for $20, and it worked like a charm. The liquid remelted and it smoothed out. I was very happy with the final results.
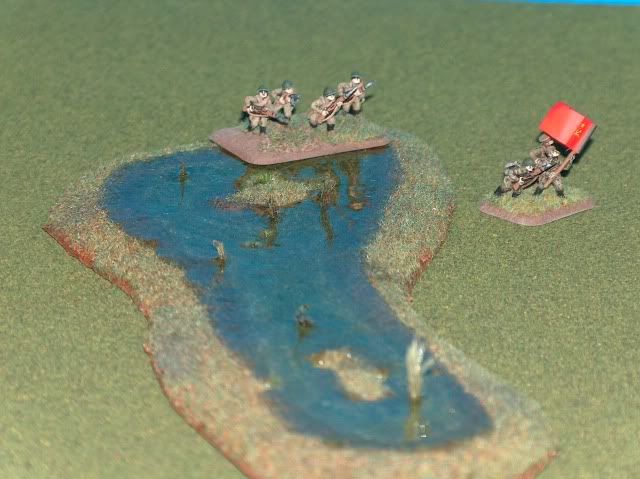
A few days after I finished these I was...pa-rousing my local hobby shop, and found some of this liquid water stuff that was...low and behold...already liquid. How could this be? How was that possible. After a little bit of research, I found that all you do is poor it in and let it dry for 24 hours. This was to good to be true, no heating or pouring or reusing a heat gun...I had to get it.
So I tried, it was SOOOOOOO easy. But....Yes there is a BIG BUT!
Believe it or not it dries WAY too slow, and its WAY too clear. I"m crazy you ask? well you'll see.

I left the liquid to dry over night. But when I woke in the morning I was devastated. It took so long to dry that it had almost all seeped out between the joins of the balsa would. Even through the foam putty.
Now, normally you 'scare' the bottom of things like this so putty or what ever you are working with, sticks to the surface better. Well, because it dried so slow, it had time to seep into every nook and cranny. The surface of the water so perfectly mirrored the bottom that you could see every scrap and cut I had made in the matter. not through the water mind you, but the surface of the water shaped exactly like the bottom.

The good news was that it sealed up all the joins in the balsa wood. So through trial and error, I figured I had to apply the stuff 3 or 4 times in smaller quantities. leaving it to dry for 24 hours each time. It also said DO NOT apply heat to the stuff. so if you had some imperfections...you were shit outa luck.
But in the end the turned out pretty good. OH ya I mentioned they turned out too clear. Ya, from an angle they don't look too bad, but from over top, you can barley even tell the stuff is there. Its crystal clear and you can see the bottom. The stuff you had to melt was at least a little bit foggy, looks like real water. I'll have to try adding some green or brown ink to it next time.

Any way they turned out pretty well. I think I almost like to work with the melting stuff better, but I have a few more ideas I'm going to try to get the liquid stuff to work.
Sorry so long for this article, been busy. I hope to have another one soon. I've started to try airbrushing again...yikes.
 Well, I'd have to say my 2nd attempt at airbrushing has been very very successful. I don't even know if I have enough to post here, besides saying WOW!I painted all of this, Prime and base coat in one night. I can't even say how long it would have taken me before with a brush.
  OH, and the secret to the success of my airbrushing...just like the wash, something you would have never expected...Windex. Using windex to thin the paint. I use it at about a 2:1 ratio. 2 parts paint, 1 part windex. It still might be a bit thick. but no where near as thick as an aerosol can. I tried at 1:1 but it was way too watery. I've read so many people having problems with clogged nozzles and such, and I've had zero problems using the windex.