Schwere PanzerJagerKompanie Part I - Intro
Schwere PanzerJagerKompanie Part II - Preperation
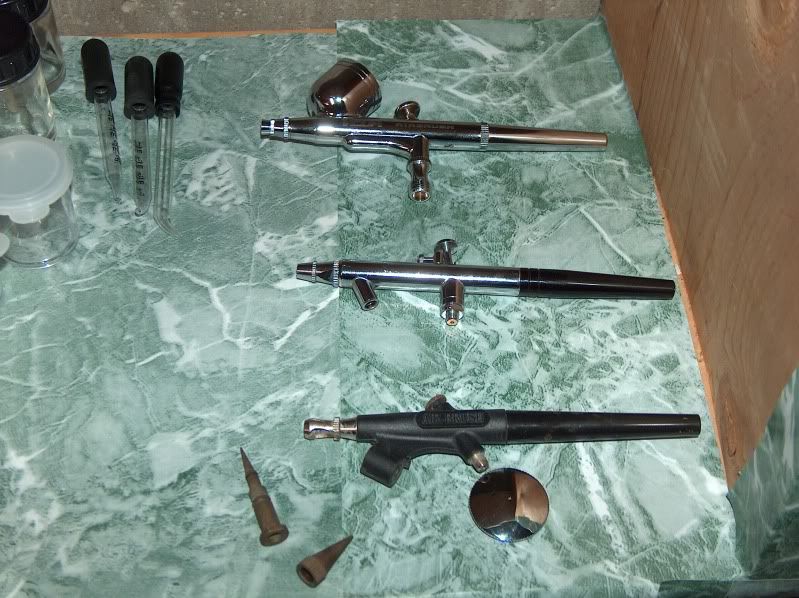
I use 3 kinds of airbrushes. I use a single action for all the priming and base coating of vehicles. I use a double action 3.5mm suction for infantry. And I use a double action 3.0mm gravity fed for camo patterns. I do have a 2.0mm airbrush, but really haven't broken it out yet. the 3.0mm seems to be good enough.
For all the noobs out there. If you can get gravity fed airbrushes do it. I love these things. They use way less paint, way less maintenance, and they just spray perfect every time. The suction ones are always just so much work, and they seem to work different all the time.
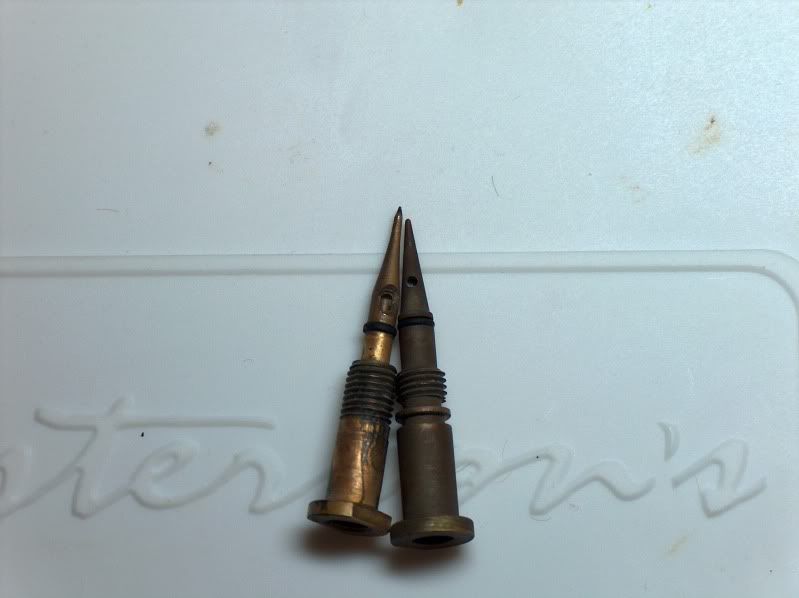
I was using these 2 single action airbrushes in conjunction so that I wouldn't have to spray, clean, spray, clean. I thought I could spray 2 different colors and then clean both. One of the airbrushes I could almost never get to work. And if it did work, it went through paint like it was going out of style. Then for some reason I happen to see the nozzles side by side. Well HOLY SHIT. Look at the size difference in the nozzle. No wonder that stupid thing sucked. No pun intended. Needless to say I've stopped using that airbrush.
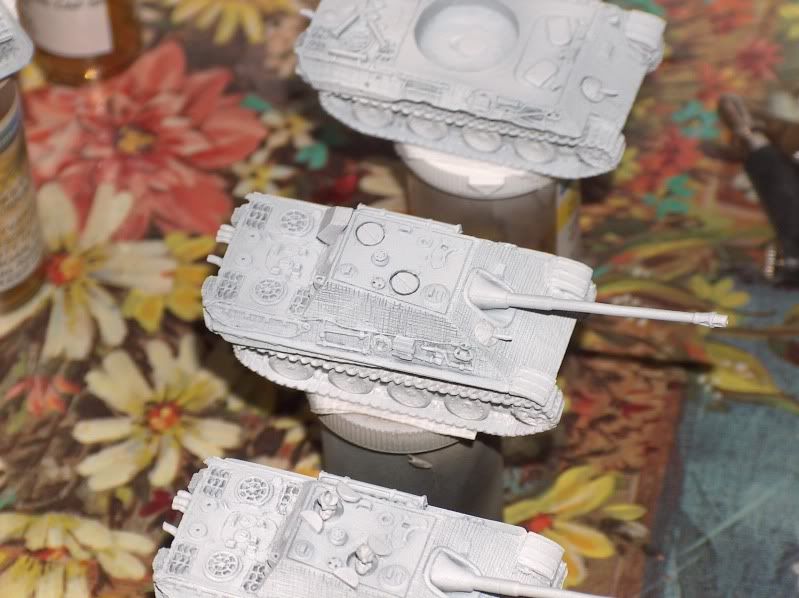
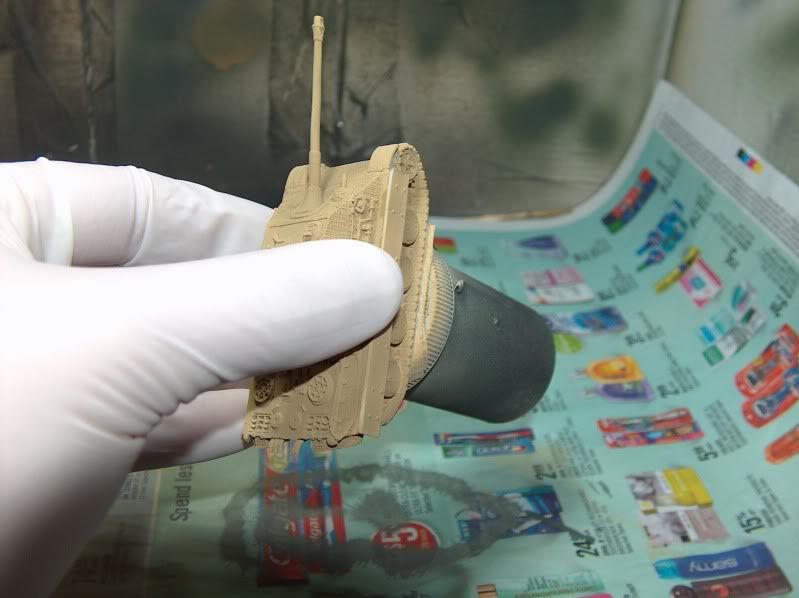
Lets see whats next? Oh yes, I go back and clean the single action brush that has been sitting in the simple green. Then I get ready to base coat the Tanks and RSO tractors. I use XF-60, Dark Yellow for German late war vehicles. Again I mix it about 3:2 with windex. Oh ya I almost forgot to paint the Schurzen as well.
I once again I stick the single action nozzle in simple green and let it soak for a bit.
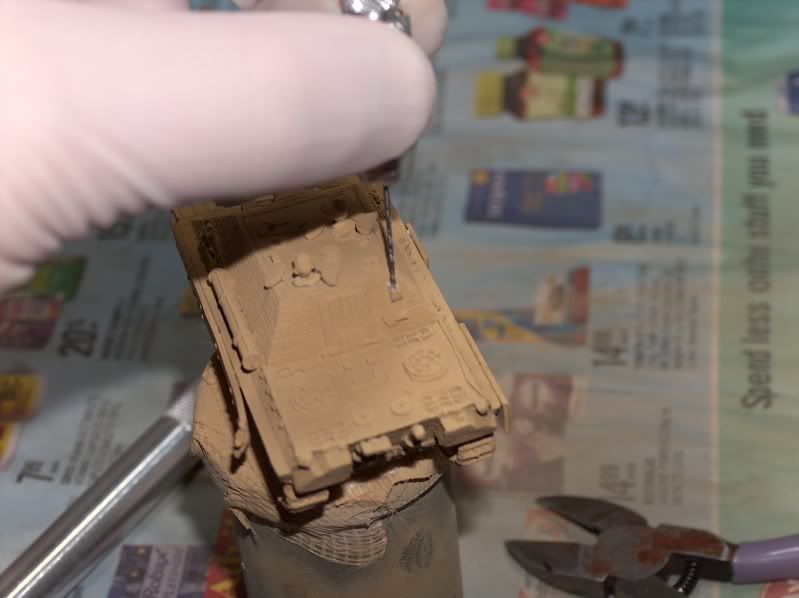
Tamiya paint dries very quickly so, I now take this opportunity to glue the Schurzen on. I try to wear gloves when ever I'm going to be touching painted parts. These jagdpanthers may have actually given me a revaluation with the panther shurzen. I wonder if I've been putting them on upside down? They have these tabs that look like you would glue them under the hull. The problem is on the jagdpanther they don't fit. If you put them on the same as a regular panther they end up crooked. the jagdpanther actually has this lip they fit on, but the only way they fit is if you cut these tabs off....or put them on upside down. They fit great upside down and the tabs sit right on the track. When I put my panther A's together, I may have to see if they fit that way as well.

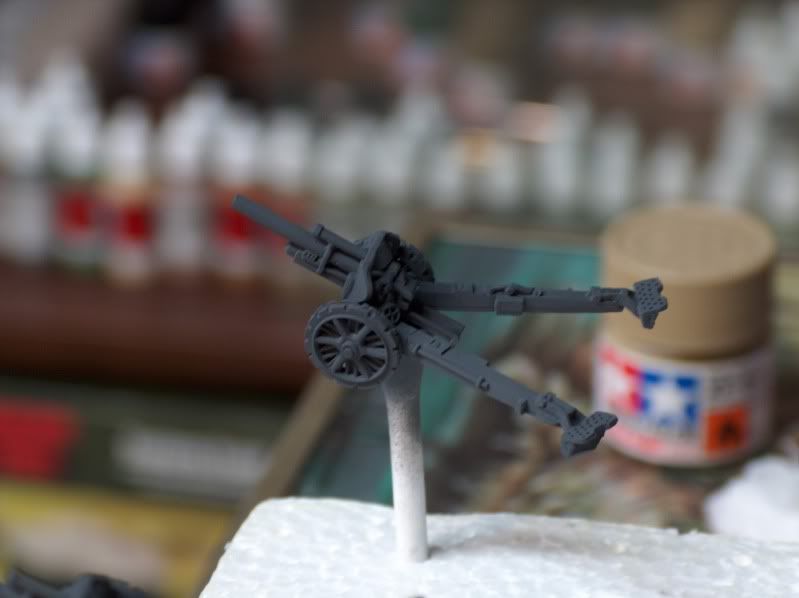
While the glue dries, I will paint up my 10.5cm guns. I'm using XF-63, German Grey for these. Even though this is for late war I want these guns to be mid war. This is an older gun set, so If I ever decide to paint a late war gun set, I'll get the newer molds. I also had a KV-1e captured tank I wanted to paint. I had done it in dark yellow, but upon doing more research most captured KV's were German Grey.

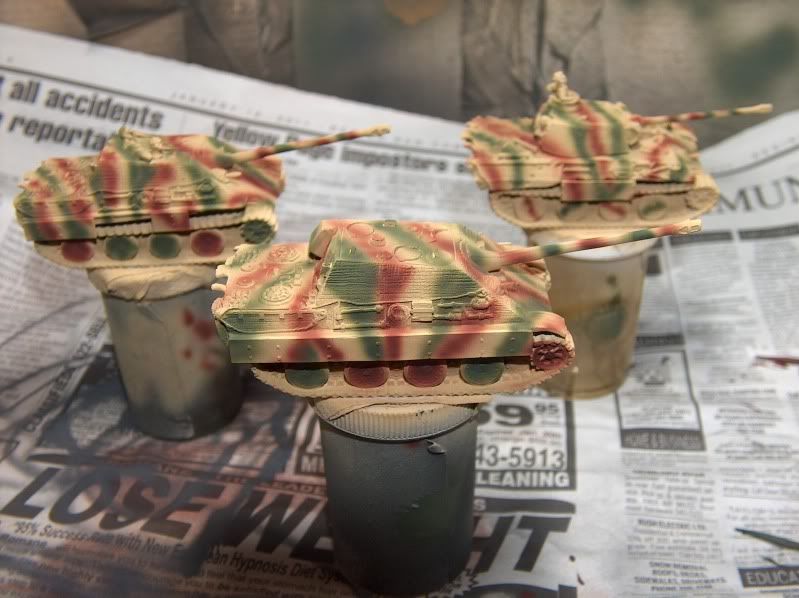
With the guns done, the schurzen should be dry, we can move on to adding the camouflage to the jagdpanthers and Noaks Panther. For this I will use XF-58, Olive Green and XF-9 Hull Red. Normally, like with my Konigstigers, I used XF-64 Red Brown, but I wanted to try this Hull Red.
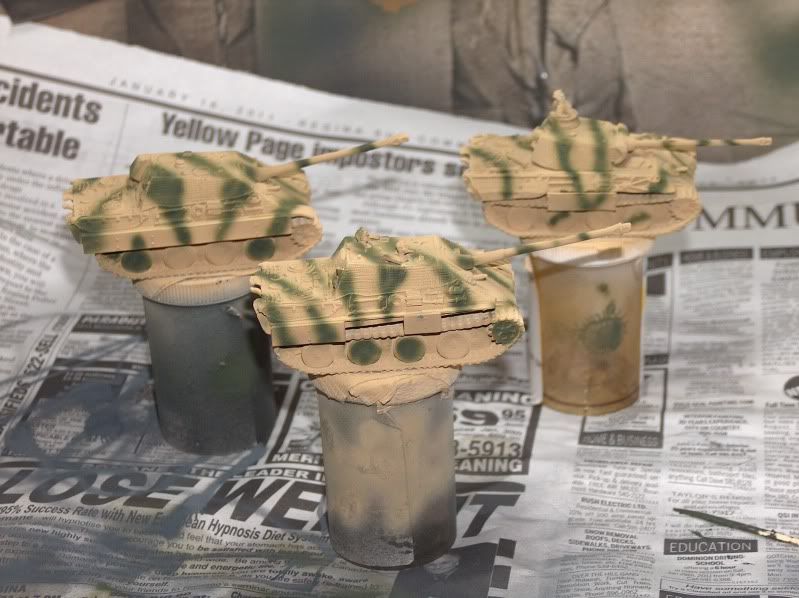
I started with the green and did all 3 vehicles. Then the hull red. I know it doesn't really matter when it comes to camo patterns, but it does really seem harder then it looks. It never turns out the way you plan. At least not for me. But, I do REALLY like the hull red color. I'm going to have to do an ambush pattern with this as my base coat.
Now its on to details.
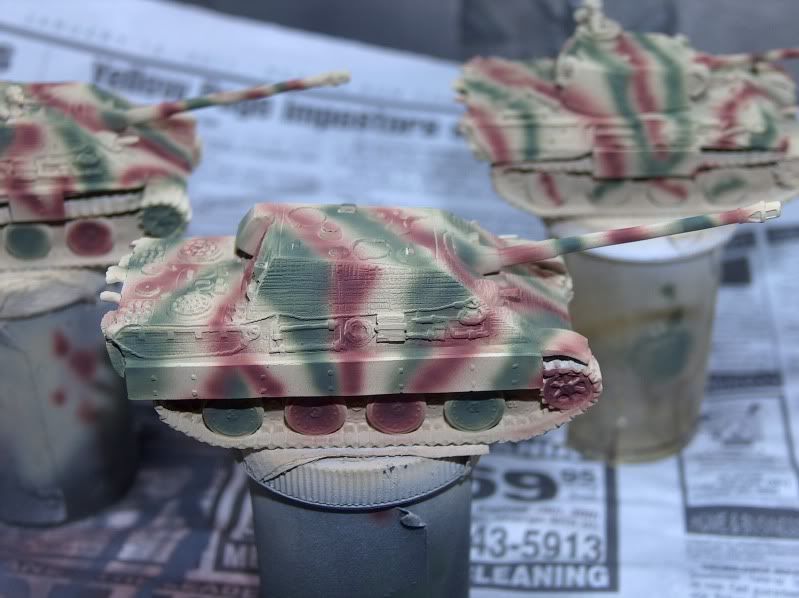
Did I mention I LOVE that hull red color? Man that looks sweet. Much better then the red brown.
ReplyDeleteA very good guide Kage: something like this would have saved me much experimentation several months back. Look forward to see the final result.
ReplyDeleteCdlT
Thanx Chevalier, Means a lot since your stuff looks so great all the time.
ReplyDeleteWait until I get to decals, that is really my forte'. Lots of experimenting to get those right.
Bad paint can't be fixed, but good paint can be ruined by bad decals.
Looks good! And you seem to have accomplished quite a bit in a day or two.
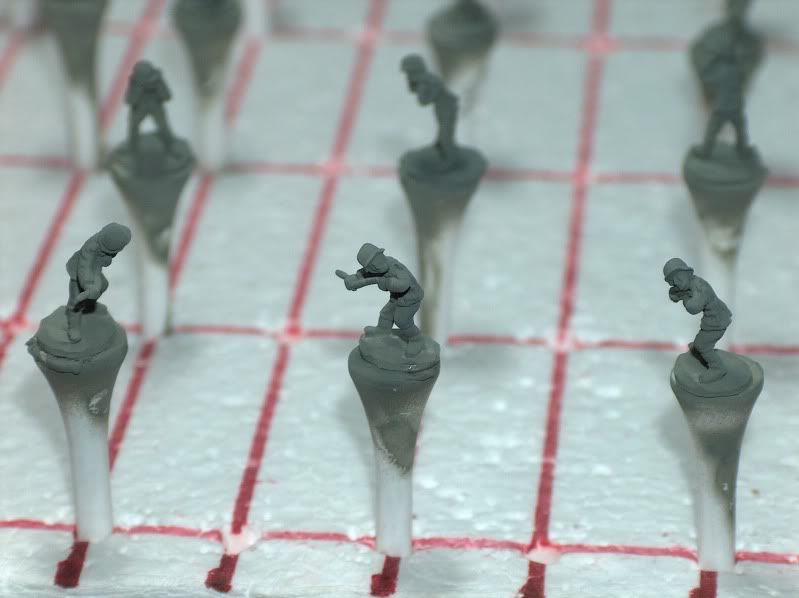
ReplyDeleteya its the next step that takes me so long. painting details. But looking at the gun crews it shouldn't take me to long. they have zero equipment. They aren't even wearing belts.
ReplyDeletewhich is good, I only have a few weeks to finish this whole company.
I'm gonna have to buy me an airbrush...
ReplyDelete@BigLee and anyone else wanting to get set up.
ReplyDeleteBest investment I ever made for this hobby. And its not as expensive as you might think. Don't let people fool you into think you HAVE to have one of those expensive $300 Iwata brushes.
Look at the image of my airbrushes...that top one looks (and works) exactly like an iwata.
I bought 4 of those (two 2.0cm and two 3.0cm) for $100. Look on ebay there are tones of deals.
I take the Russian stand on this. When you first get started, especially like me where I had no one to help me...you ARE going to break one. So, its better to by the cheap ones then the expensive ones. I can buy 1 Iwata replica for the price of an Iwata replacement nozzle. I can by 12 Iwata replica's for the price of a real Iwata.
And when I tell you that you WILL break one...or 2...or 3...just figuring out how to get them apart and clean then....you do that math.
The Hong Kong versions work just as good.
The only other thing you need is a compressor. Look for Eastwood company deals on Ebay. You get a compressor (a quiet one) and the exact 3 airbrushes shown in my picture above for $145ish.
And the best part is, I never use an aerosol can ever again. I prime, and as you'll see even varnish through an airbrush. When a lot of people told me you can't varnish through an airbrush.
I had to figure it out. Where I live, you only have conditions for aerosol cans outside about 5 out of 365 days a year. Its either, +40 and humid, -40 and freezing, raining, or 400km winds. Not idea for a painting hobby.
I was having nothing but trouble with aerosol primer and varnishes. I even quit painting for a year, because I was so frustrated.
The airbrush literally saved my hobby.
Not to mention the speed an quality of my work skyrocketed.
Looking good buddy!
ReplyDeleteI echo the airbrush!
ReplyDeleteMy personal issue is the compressor. I went cheap and it shows. But I need to let my skills improve before swapping out compressors.
Best investment! Other than the rules. And the Cobra book. And the models. And the terrain. And the basing materials. And...
Seriously, airbrush is the only way to go.
Can you tell us the brand of the airbrushes that you like? Mine was working fine and now it is broken - nothing to do with the missing parts after my son cleaned it! : - )
ReplyDeleteYa, I actually buy the ones from Hong Kong on Ebay. And for this exact reason.
ReplyDeleteMost people on the Forums will tell you to buy the super good expensive airbrushes like Iwata. These can run you like $300. just replacing the nozzle costs $60+.
The cheap hong kong ones work just as well (despite what most people think), and are WAY cheaper. I bought 4 of them (including shipping) for $120. Two 2mm nozzles, and two 3mm nozzles.
And if you break them, it's cheaper to replace the whole thing then an Iwata nozzle.
I view airbrushes like Soviet vs German Tanks. I can buy 10+ airbrushes that are just as good, for the price of 1 good Iwata. So, its no big deal if one gets destroyed.