Wednesday, April 27, 2011

Radio Free Battlefront vs WWPD

In Radio Free Battlefront Latest Episode Mike poses a question back to the WWPD guys.

I thought it would be very interesting to answer these questions myself.

On a scale of 1 to 5 how would you rate the importance of Modeling, Historical, Gaming, and Social as it pertains to Flames of War.
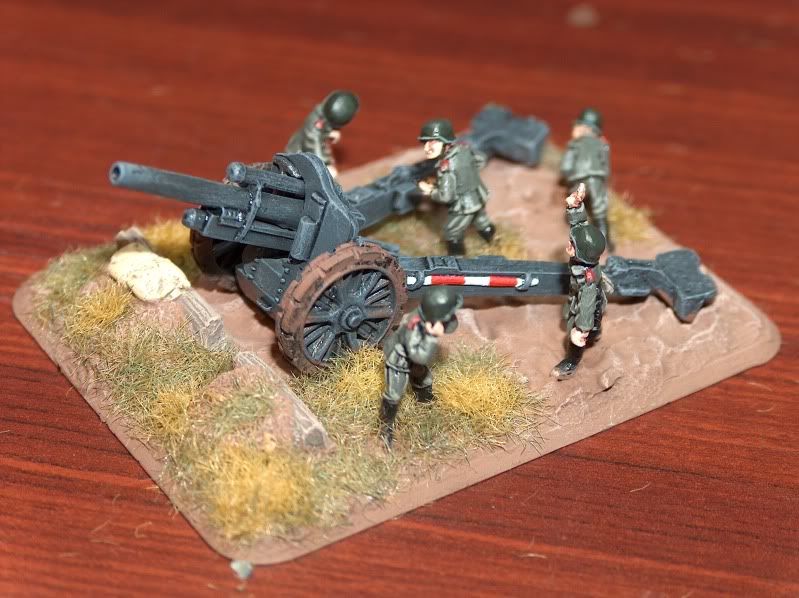
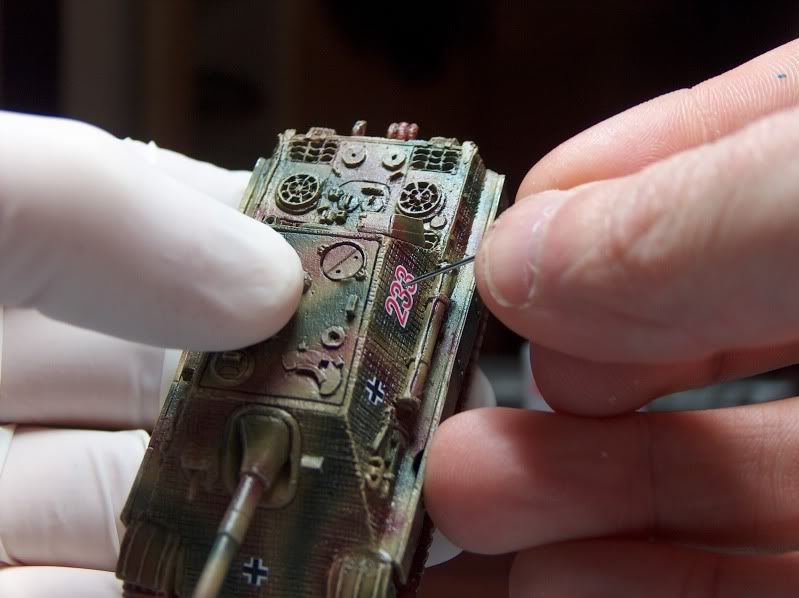
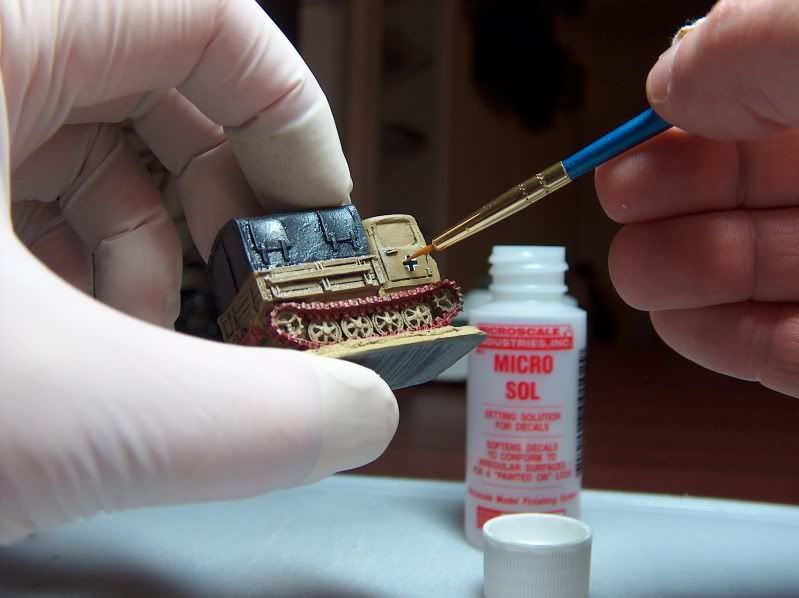
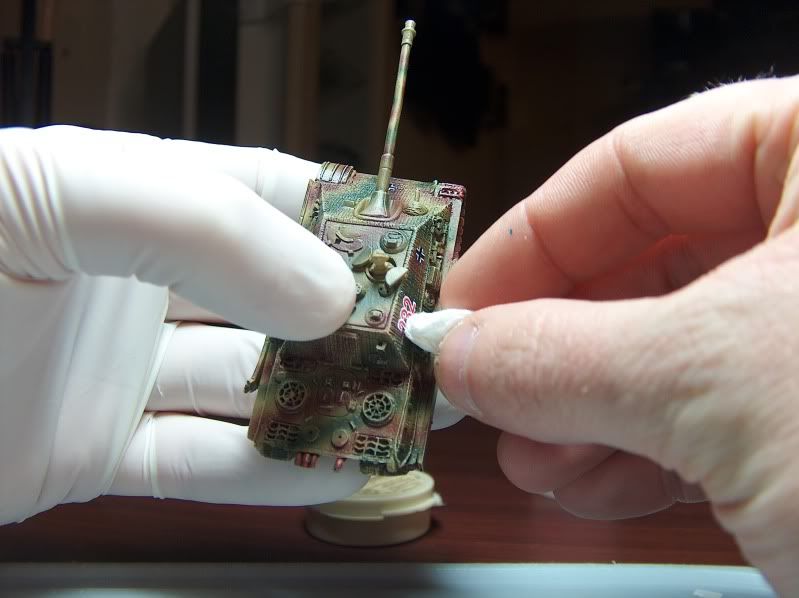
Modeling - 5
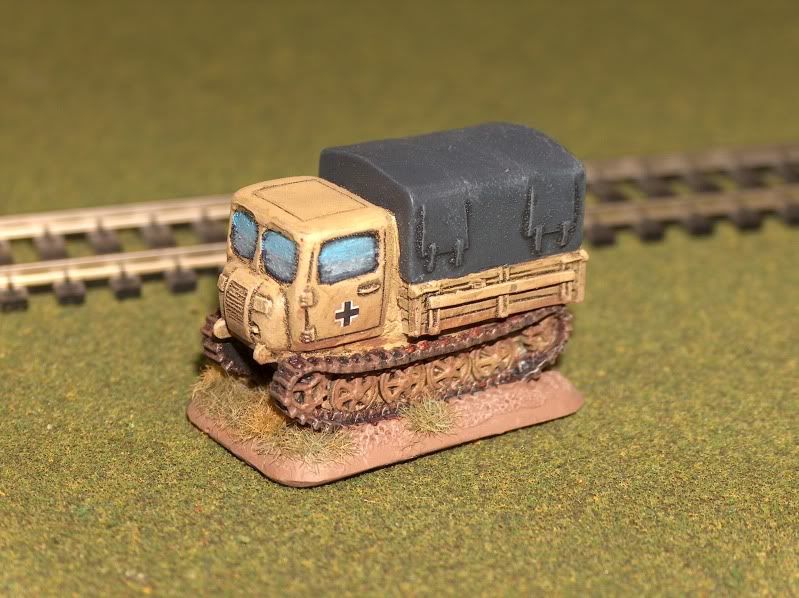
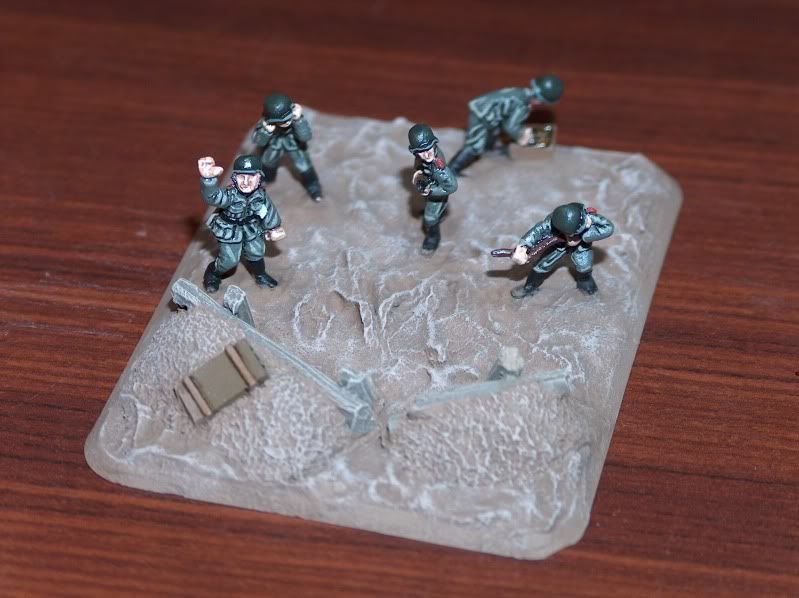
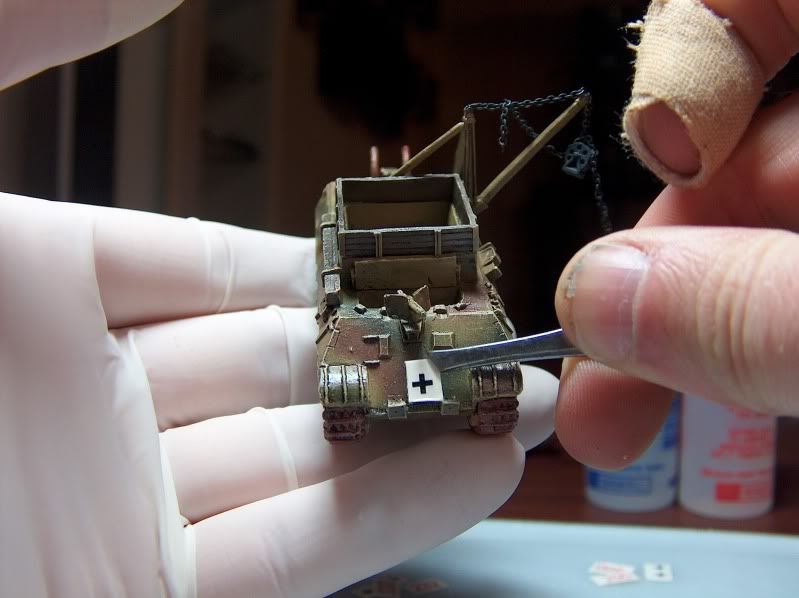
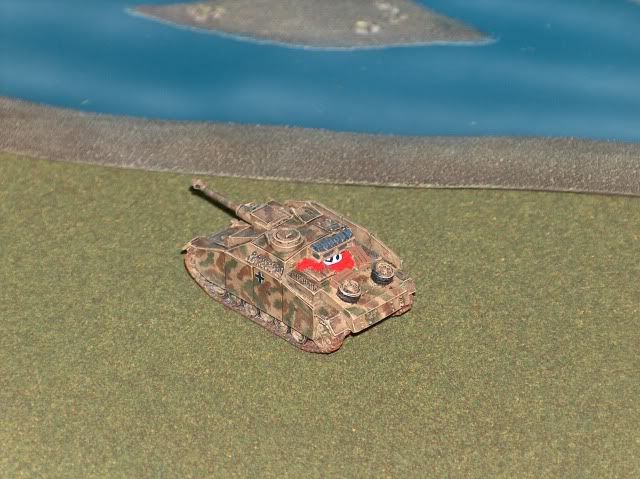
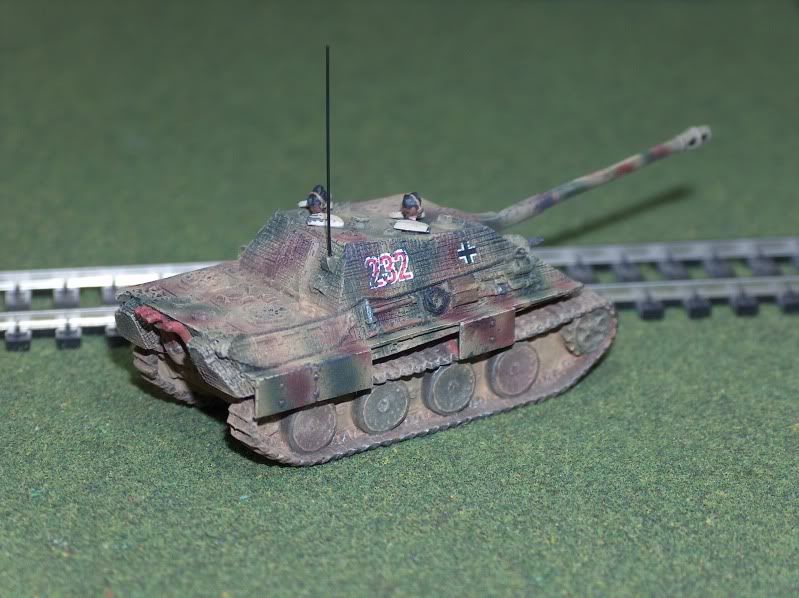
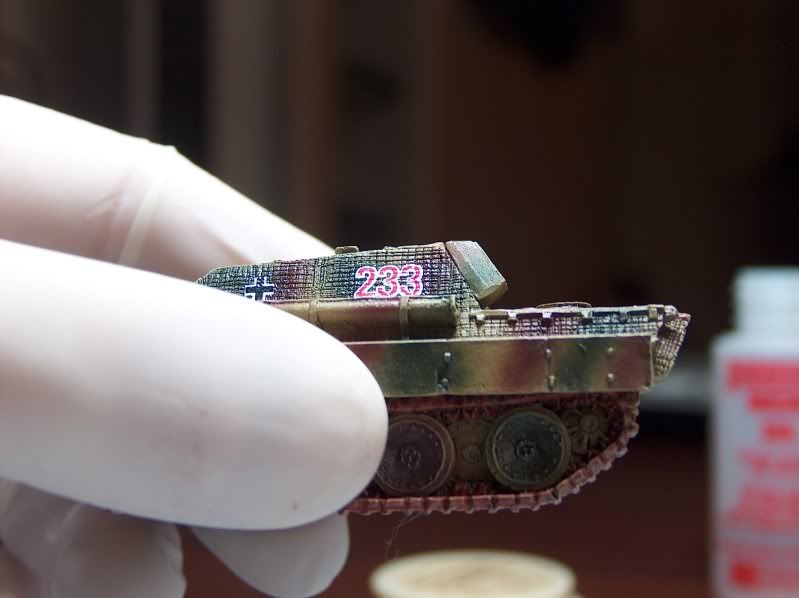
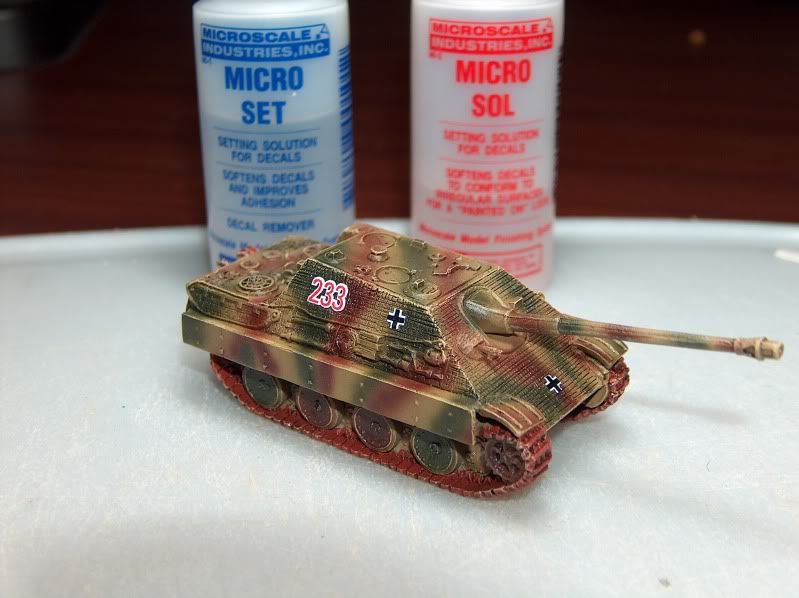
The Last hand painted model I did.
As the Radio Free guys pointed out this could very easily be a 2 or a 5 depending on what you are painting at the time.  When you are painting 240 Strelkovy this number quickly drops by the end of  the project.

I'm trying to be a 5 all the time.  But I'm such a slow painter by the end of some projects I just want to get it done.

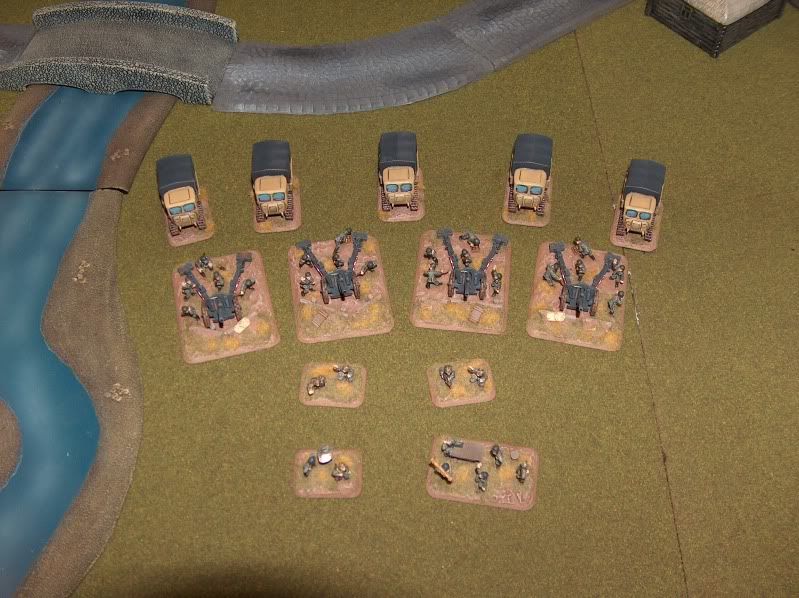
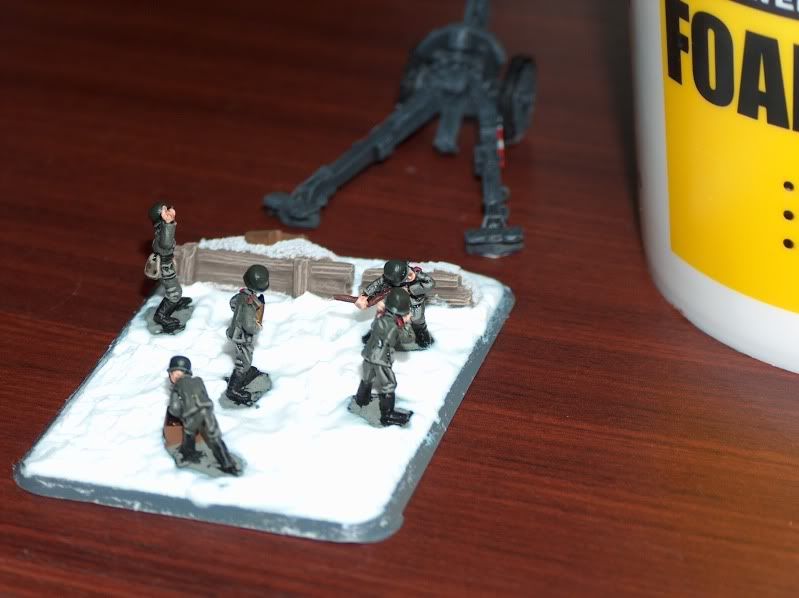
This is something that has to be important to me.  The FoW community has all but disappeared, with a few people here and there.  So I don't actually get to play much.  I've had to concentrate more on the modeling aspect.  And my stuff is getting better and better all the time.  Where as I think most people are happy with something simple to get theirs stuff on the table.

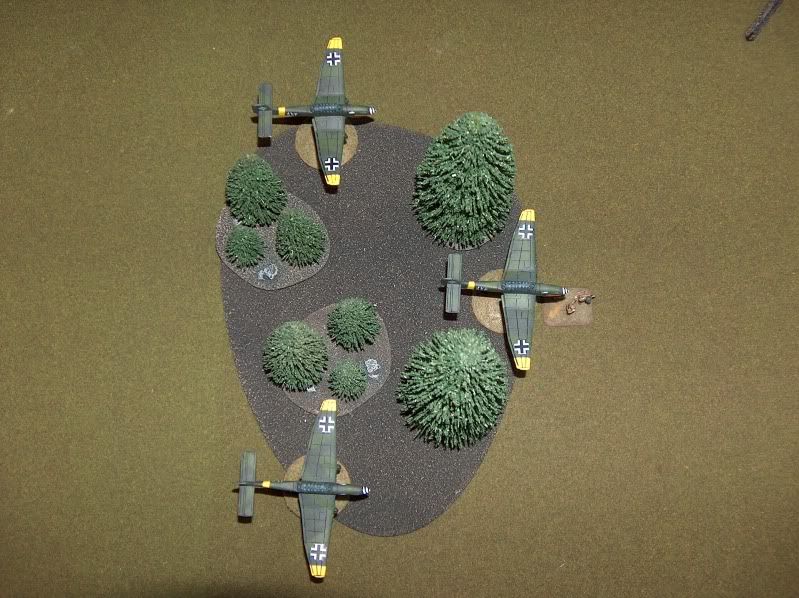
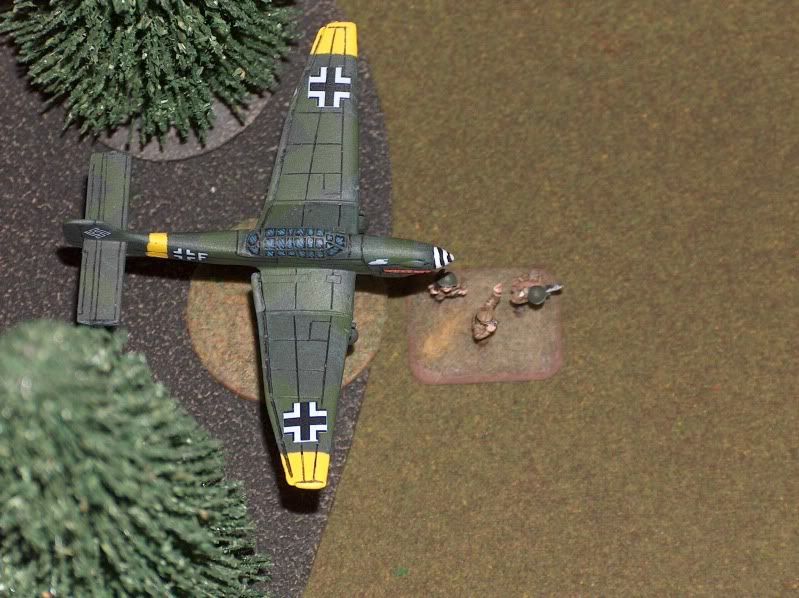
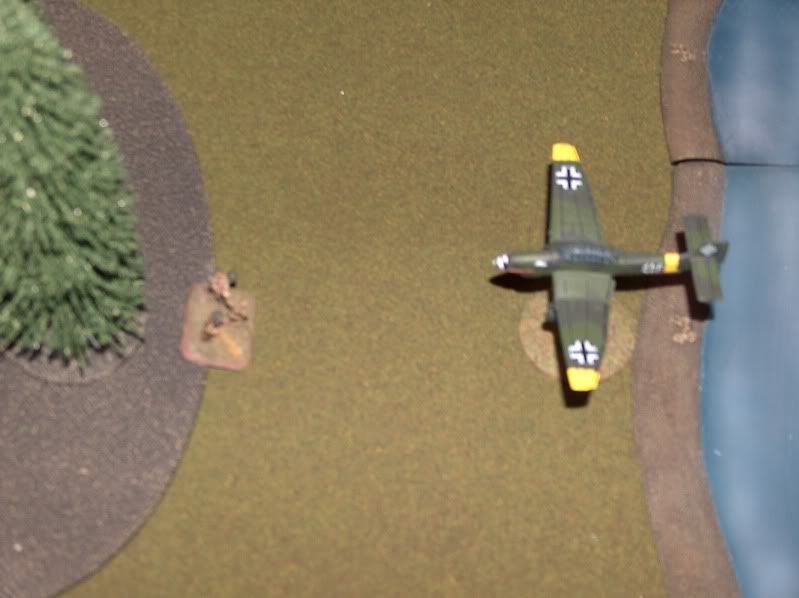
This is also why I've played the big cats lately.  I want to show off my newest work, but I'm so slow I have to play these armies that have very few models.
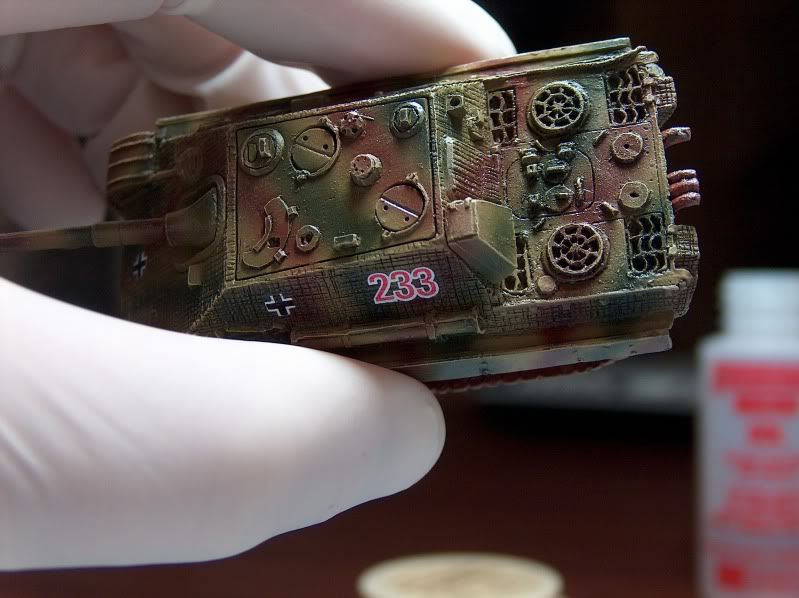
Historical - 5
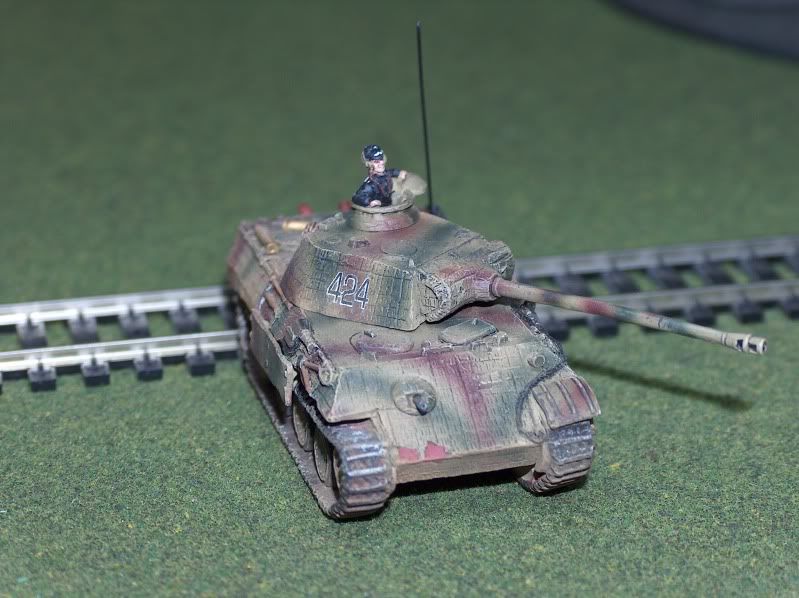
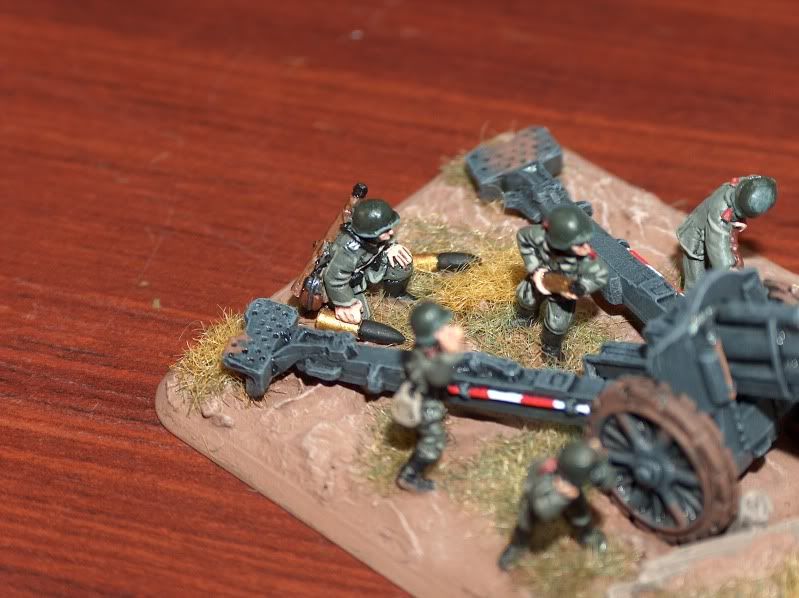
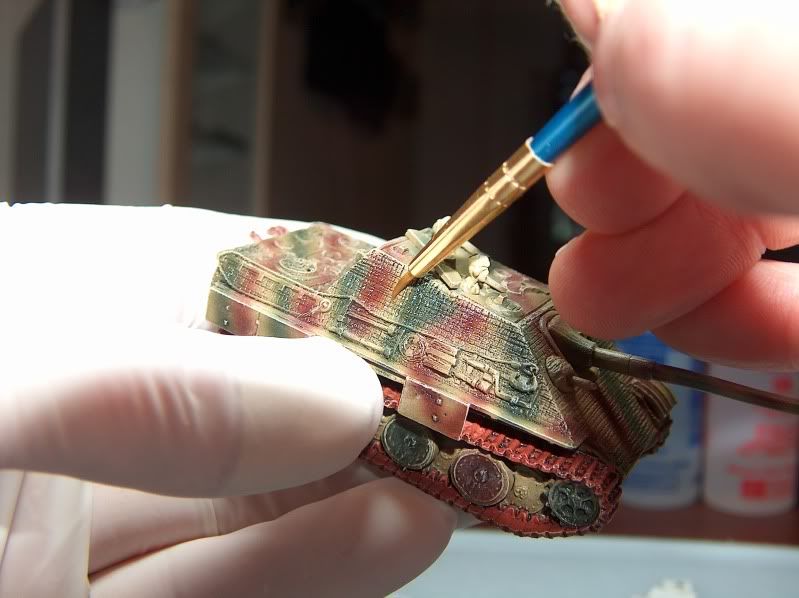
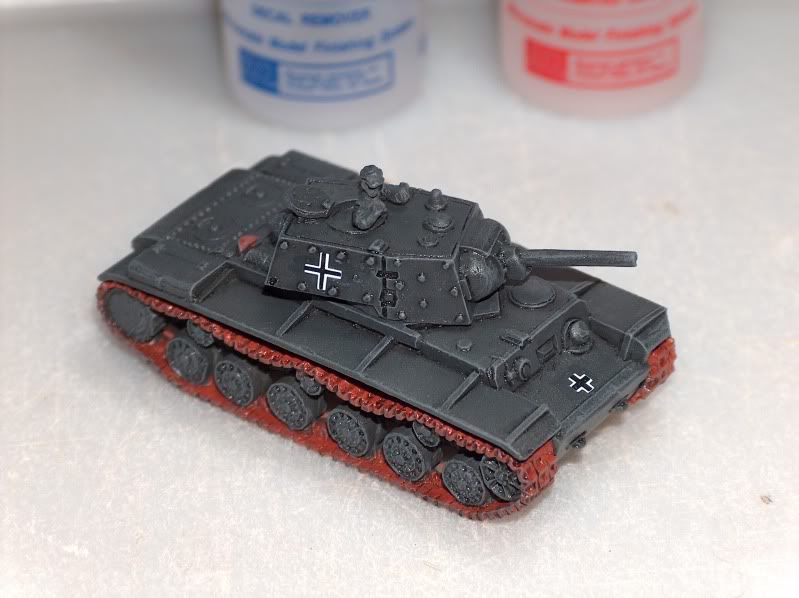
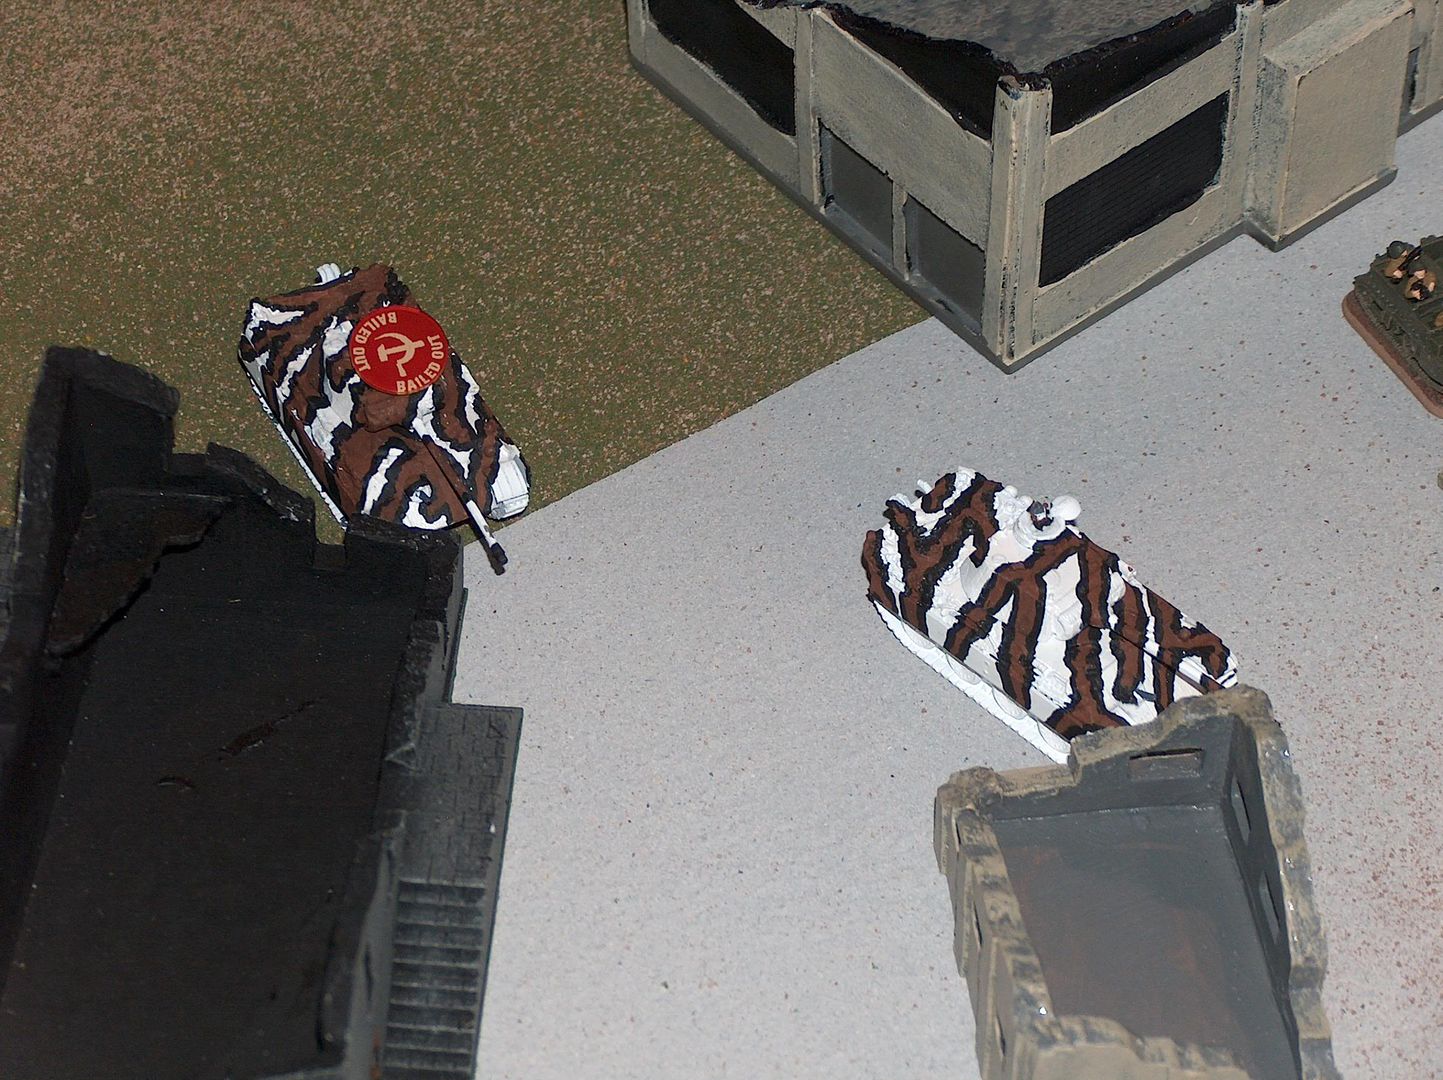
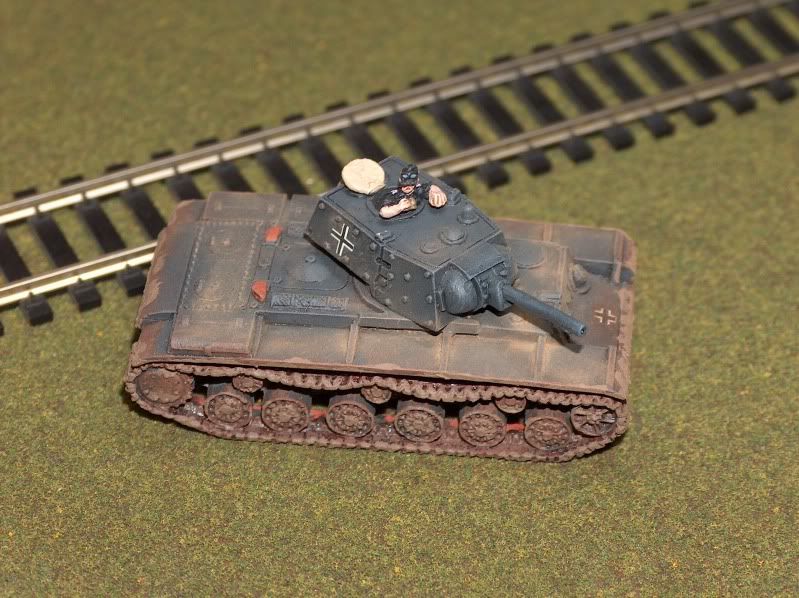
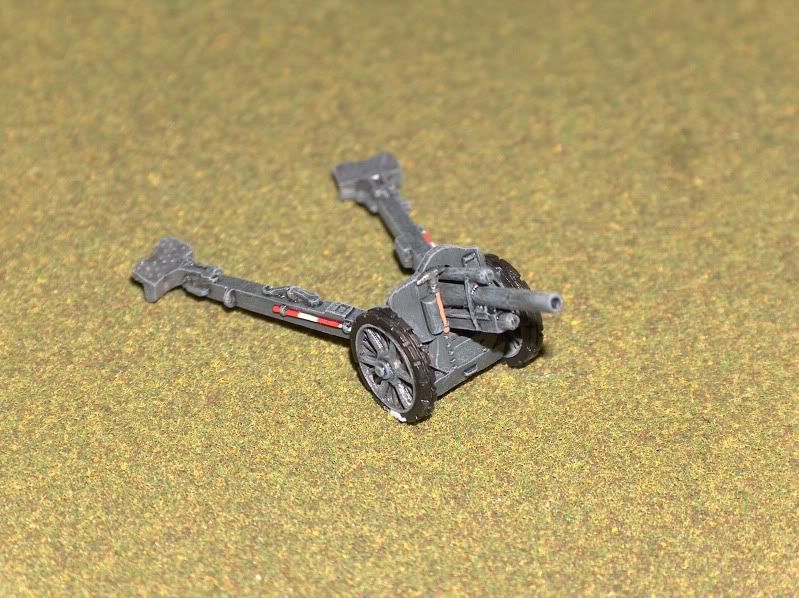
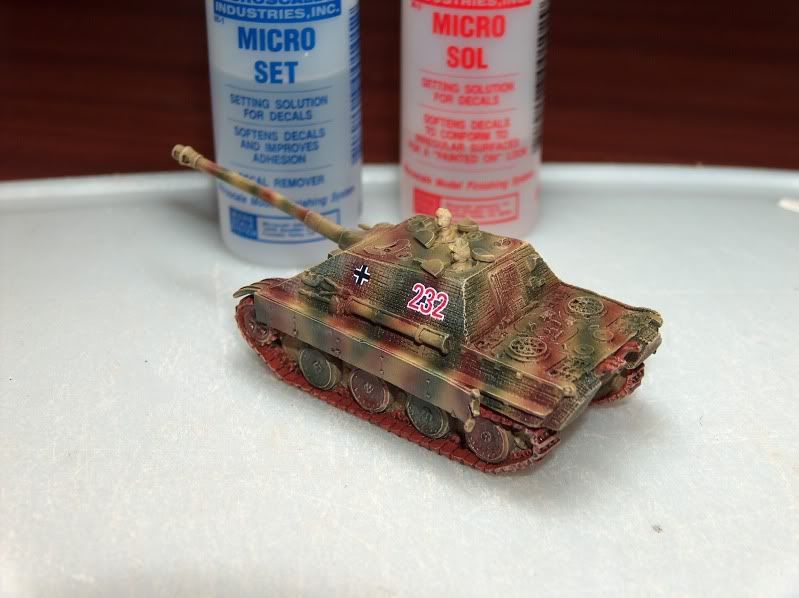
Cool panthers, but no detail.
When I first started FoW I thought I was a 5.  I knew a lot about WWII.  I hadn't even scratched the surface.  So in my minds eye I thought i was a 5 when really i was a 2.

But now I am defiantly a 5.  I will not paint something because it looks good.  I've see some great paint jobs at the last 2 tournaments on individual tanks.  Brian's T-34's...their paint scheme was super cool, but not historical in anyway.

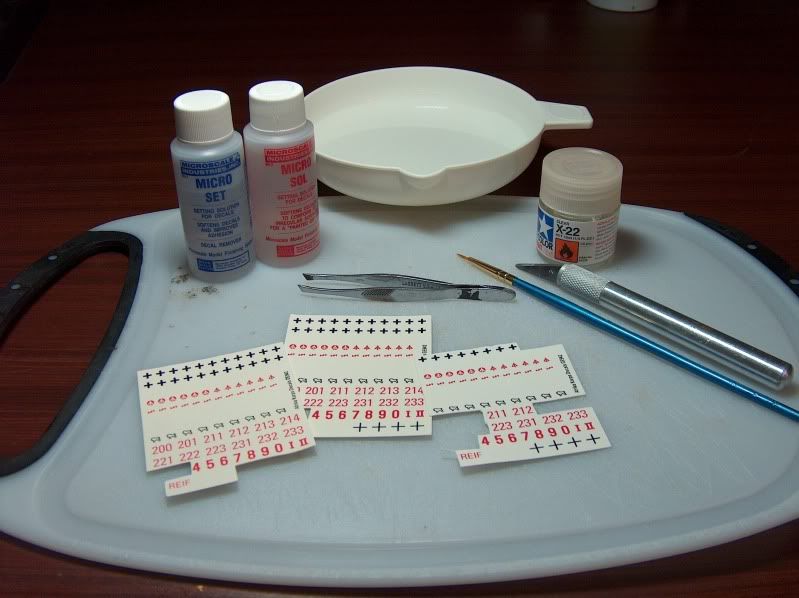
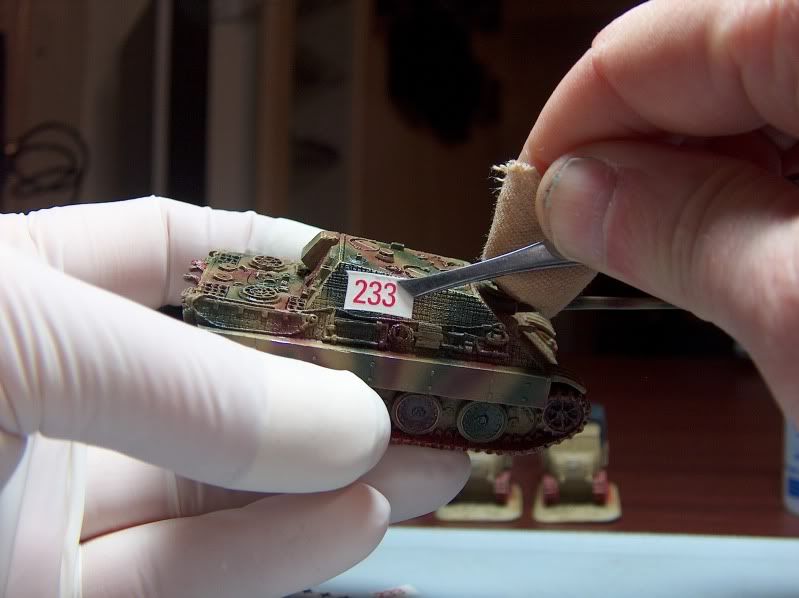
And this past weekend, another guys panthers were painted really cool, but also not historical.  Which is fine. To each their own.  But there is also no detail in them.  Maybe they weren't done?  I started out this way too.  But now I want my stuff historical.  Or at least as best as I can get it.  The research is one of my favorite parts of this hobby.
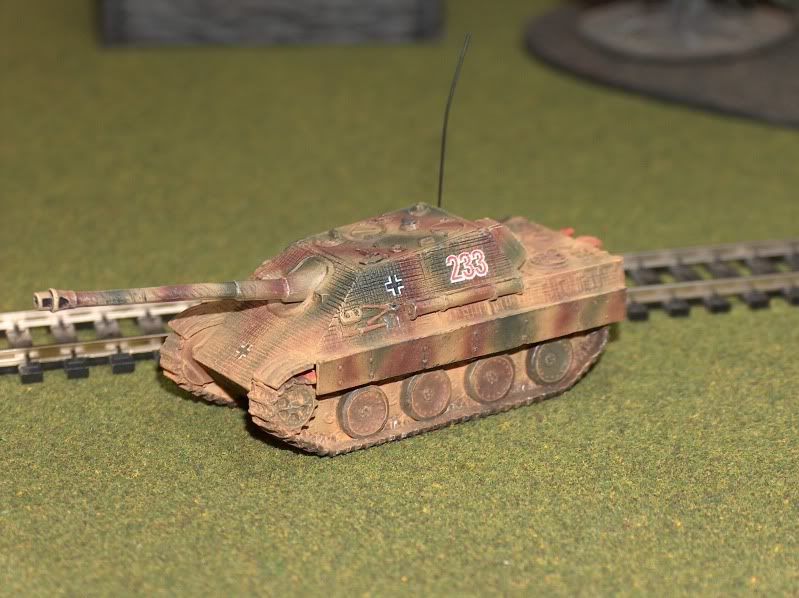
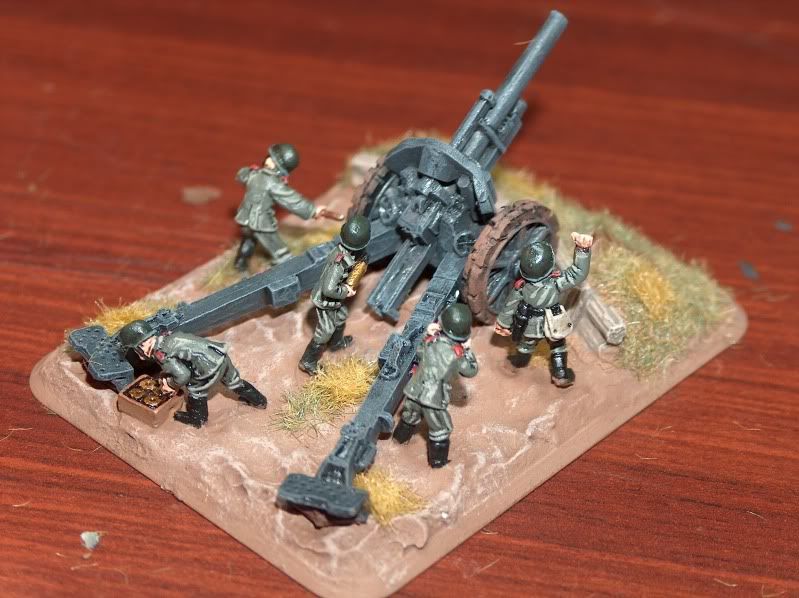
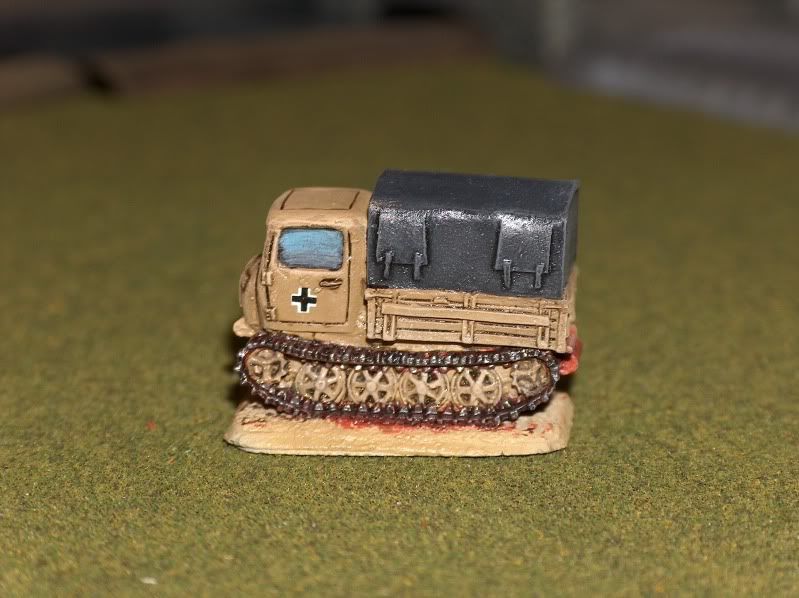
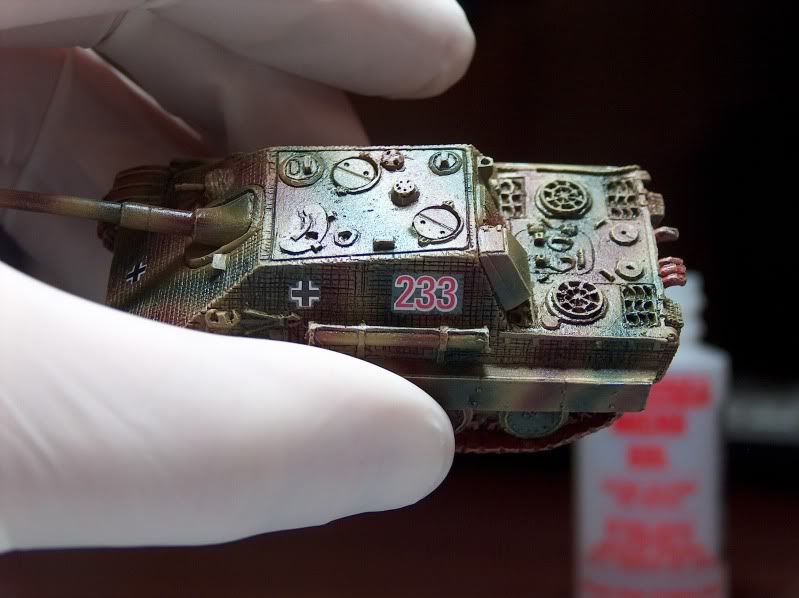
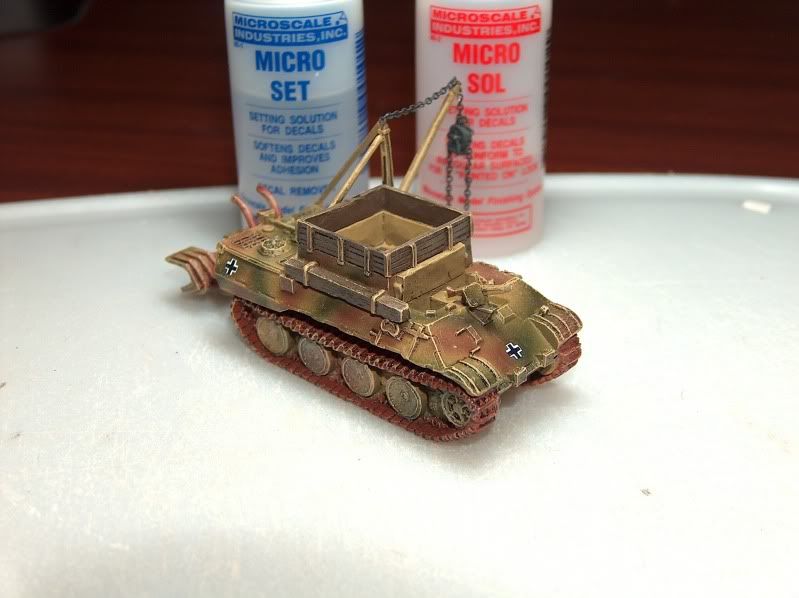
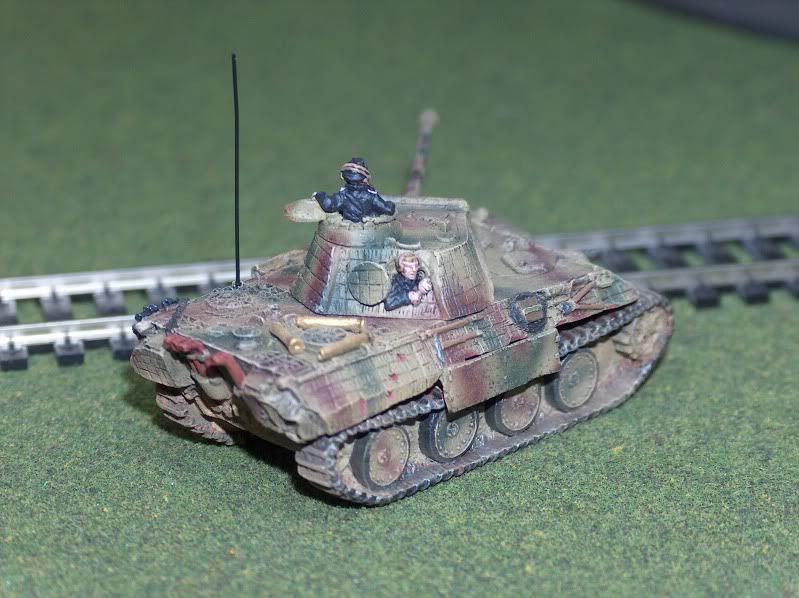
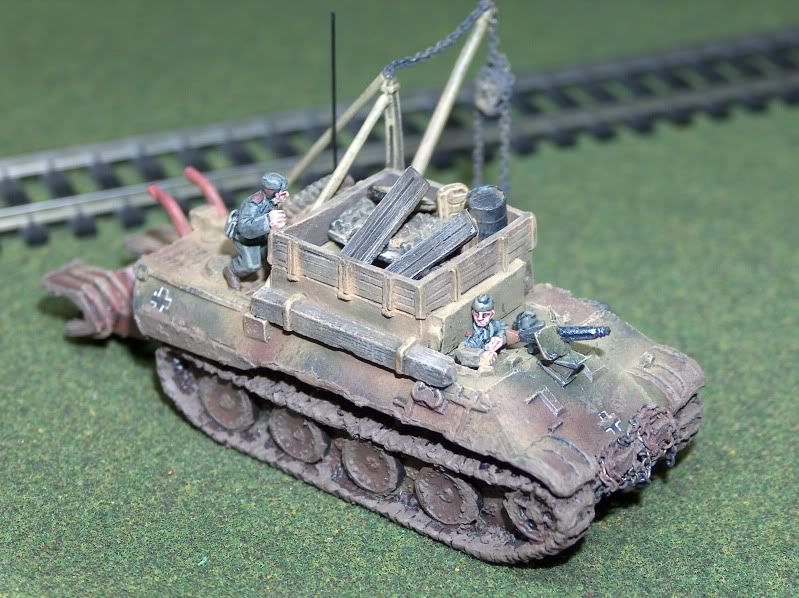
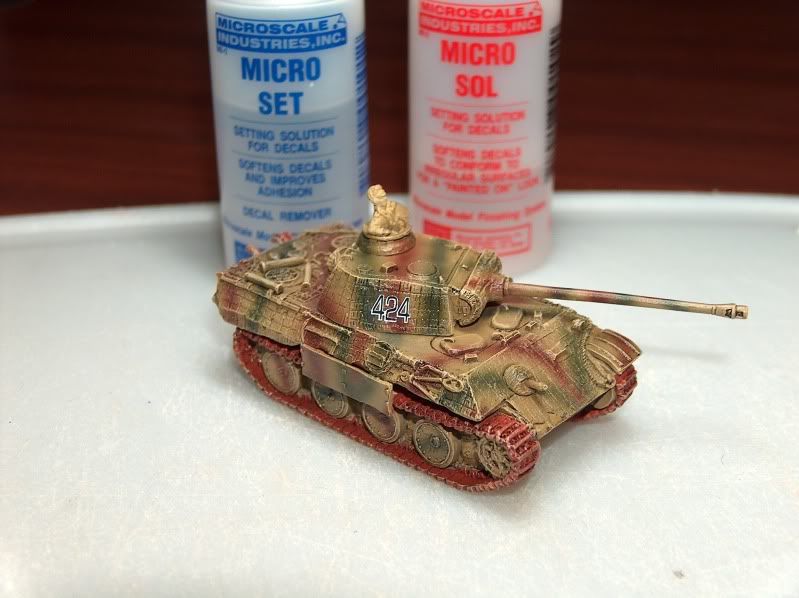
My First panther
Because of these, I'm actually thinking of doing a Pink Panther army.  Not historical, but it would be fun.  One can't be all business.  I may even field them in a tournament. 

But historical stuff is important to me.  I even have a few Panzer III's where the crew uniforms were painted field grey instead of black.  I just didn't know when I first started.  So, those will eventually go into the Simple Green, and repainted.

Historical is actually suppose to be part of your score, but I find most guys don't know whats historical.  They vote 1 to 5 based on how good it looks.  I also not sure guys really know what they are looking at half the time, or they just give everyone the same score.  Shawn's armies are insanely well painted.  One of my buddies even borrowed one of his.  5's across the board without question.  I could even understand the occasional 4.  But some schmuck gave one of his armies a 1, and another one a 3.  1 is unpainted for peat sakes.  "Did you even look?"   
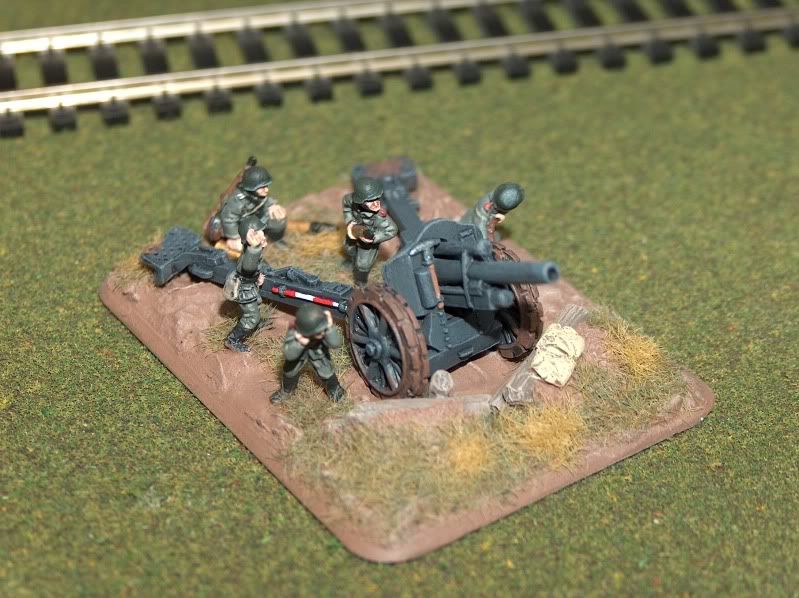
Gaming - 3
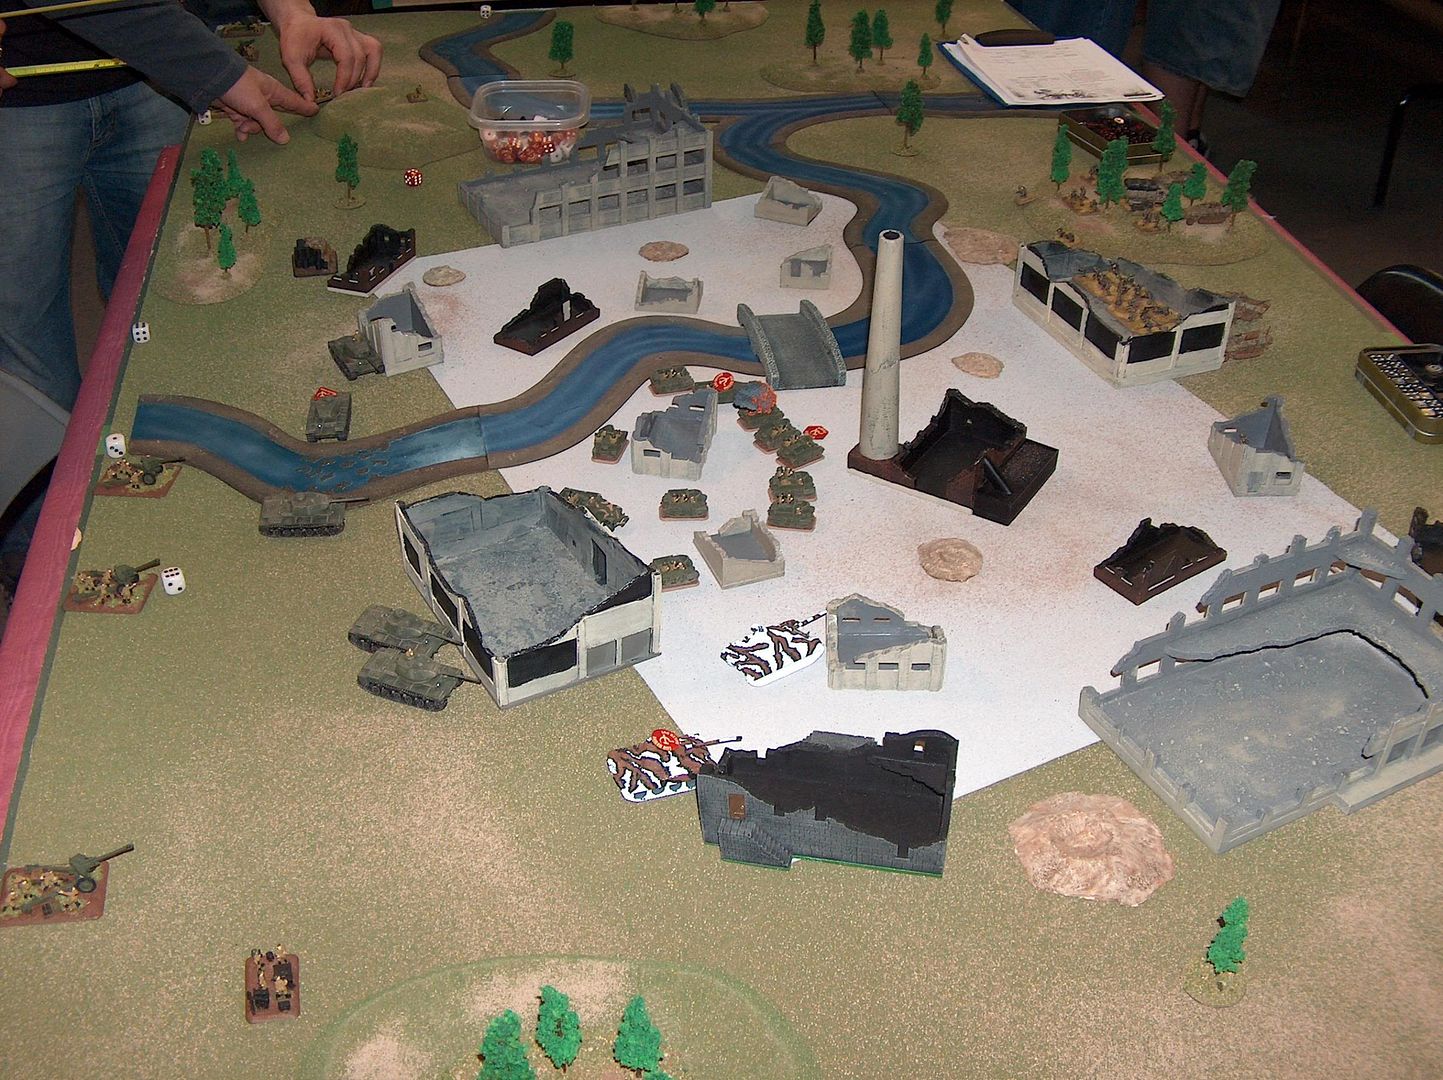
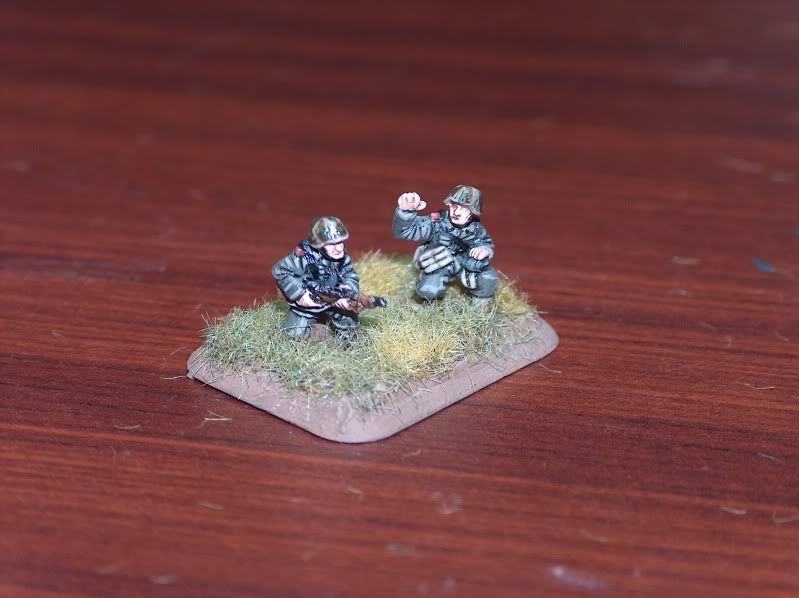
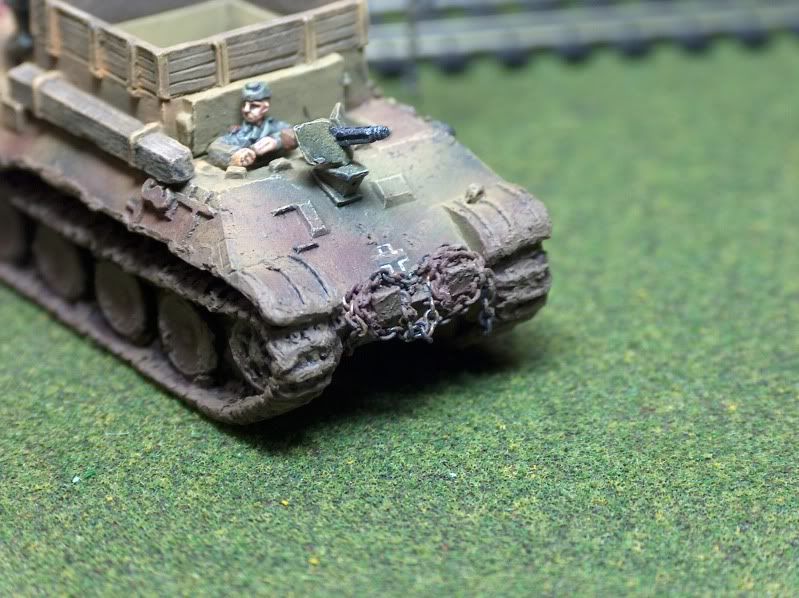
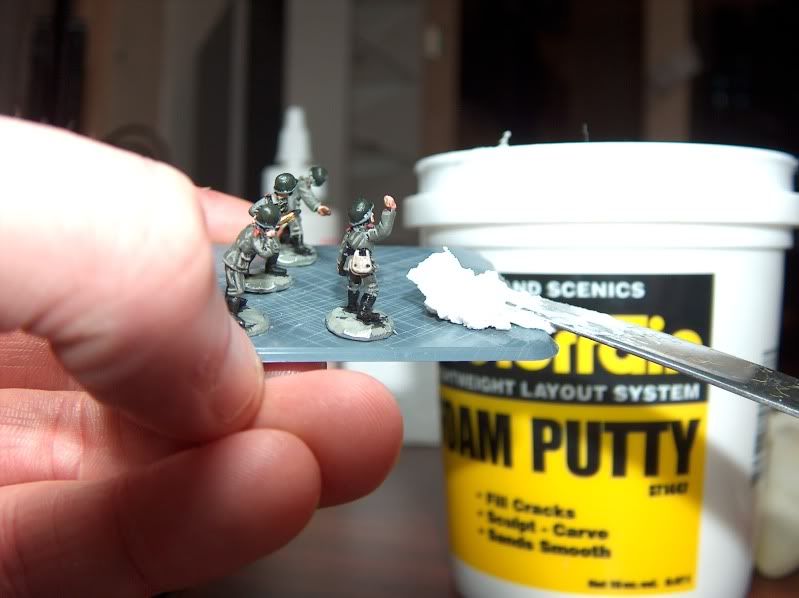
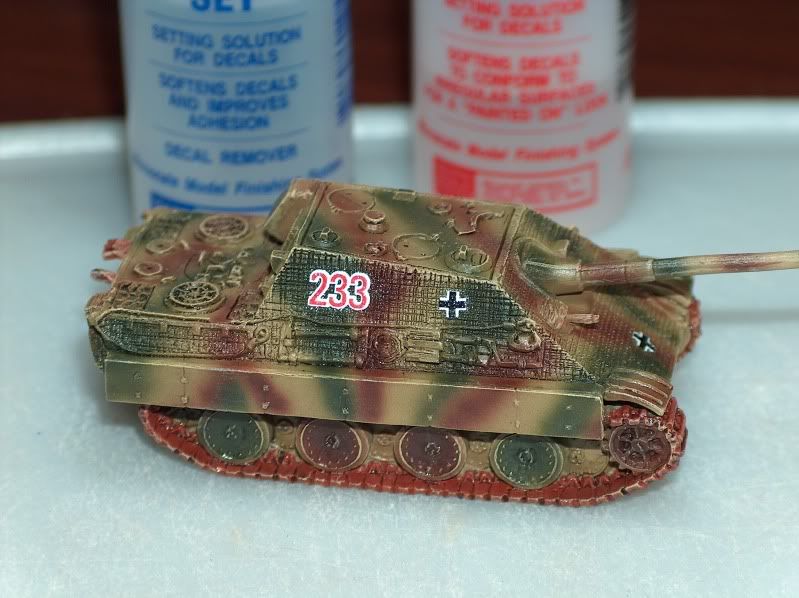
One of the first...Time for Simple Green?
This is a hard one for me to score because I am very competitive.  But the difference between me and most other competitive people I know, speaking in FoW terms, I would rather lose 4-3 in a great battle then crush someone 6-1 in 2 rounds.  I love the stress of close games.  Its very exciting.

So, playing at home for fun with my buddies, I spend a lot of time teaching.  I don't care about winning.  I want that person to be a great player, so later we can have great games.  I know guys that are so competitive, they would rather get the win by someone not showing up then playing against a great opponent.  

But really because Flames of War has all but collapsed in my city, its forced me to concentrate more on the modeling then the gaming, as I mentioned before.

I'm slowly but surely trying to build up the Regina Community.  As the group in Regina grows this number will go up.  For now the gaming is just a great by-product of the modeling.

Social - 5
Isn't that the reason we play board games?  I've met some great new players at the tournaments in Saskatoon.  I'd really like to get a 2 day event going so we could go out for drinks one night.  Instead of everyone dispersing after the tournament is done.

I even thought of giving this a 3 or 4 because I do more modeling then playing.  But really, I still talk to a lot of other people in the FoW community.  Even asking for painting advice (which I do a lot) from the FoW forum is a social aspect of this hobby.  So it has to be a 5. 

Cool question, I look forward to hearing the WWPD guys answers.

Sunday, April 24, 2011

My 2nd Tournament

Went to my 2nd tournament this past weekend. This time a pairs event. 1000 points each. My partner was none other then Shawn Morris. There were 16 players and 8 teams.

I was fielding Jagdpanthers, and he was fielding Panzer Lehr. We had very high expectations seeing how we tied for the win last tournament, and Shawn won the tournament before that. We had to be the odds on favorites to win.

They day could not have started off in a worse way. A 1 - 1 Draw. We went away from the game plan and were very cautious. I have no idea why. The plan might have worked, but the other team was so wishy washy in their strategy. Once we finally said screw this we gunned for the objective. But we ran out of time. If we would have 1, maybe 2, more turns, we would have taken the game with a 6-1 win.


Now we were under the gun. 2 other teams had finished with a 6-1 win. And it didn't look like we were going to get any where near the top. But the way it worked out we could play the bottom team because we would end up playing the same team again. So, we ended up playing one of the other teams that won 6-1.

This game was more of a cake walk then we expected. The scenario was break through, and Shawn and I were the attackers. First of all I find most players don't know how to defend breakthrough. And it showed at the tournament. No defenders won. Maybe an article for another day.

Second, the way our opponents deployed Shawn and I knew we would have a good chance. This was further hindered by their inability to bring on their armored reserves. Lance basically sat the whole game because he couldn't roll to bring his armour on.

Thirdly Shawn and I decided, no matter what, we would not sit back. We knew if we wanted to have any chance at winning we would need two 6-1 victories.

All this compounded into a 'SMASHING BREAKTHROUGH'. I think the game was over with over an hour to spare, and we had our 6-1 victory.


Now we would need some help. Lorne's team had won 6-1 again. We would definitely need a 6-1 victory and Lorne's team to loose.

Our 3rd and final game was a super fun game. And even though it inevitably turned out to be a 6-1 victory for us it was much closer then the score suggested. It was a very curious battle. We charged down the left flank, while they charged down our right flank.

We ended up taking the objective with the Jagdpanthers destroying their M10's, and Lehr PanzerGren's assaulting their infantry, and then a breakthrough assault against their dug-in Pioneers. We took the objective but this was at the same time they were taking our right flank objective.

It looked like we were going to win but couldn't afford to loose any platoons. They destroyed all the Lehr's Nebs, but the Neb commander managed to stay on. And during the way turn they desperately tried to remove our infantry from their objective. We were able to hold on, and won the game 6-1.

But now we needed help. Lorne's team had to loose. And they were the last gaming going on. Lucky for us their game ended in a 2-2 draw.

We ended up with Lornes team in 1st by 1 point, and a 3 way tie for 2nd place. It would all come down to sportsmanship and Paint. Sportsman ship was pretty much a wash. Everyone was great as usual. All sportsmanship points with with in 1 or 2 points. So it would really come down to paint.

M10's go bye-bye
The reason Shawn and I partnered is because we know we both have the best paint by far. For those that don't know how FoW tournaments work, how well your army is painted counts for 20% of your overall score. We had a 'parade' at the beginning of the tournament where all players would give each army a paint score from 1-5. 1 being unpainted, and 5 being immaculate. And after adding these up everyone would get a score out of 20. Shawn and I ended up with almost 10 points then anyone else in paint. I think we had 17 points and the closest team to us had 12.

This was enough to push us into 1st place overall for the tournament. So my 2nd tournament and my 2nd win. This will do wonders for my RHQ ranking. It ended up being a very close tournament. Out of 100 points, we finished first place with 75. 2nd place was Lorne's team with 73, and 3rd place had 69...ha ha...I said 69.

I would like to thank Shawn for being my partner. I had a great time. It looked very bleak in the beginning, but in the end our paint saved us from our 1st game blunder. Which should have easily been a route and we would have easily walked away with this tournament.

I also like to thank Dragon's Den for hosting, pitching in some prize support, and having a sale on FoW stuff. Thank you Darren and The Dragons Den!

In the making of this article, no JagdPanther lost its life! And I now have a record of 5-1-1 in tournament play.

Monday, April 18, 2011

Schwere PanzerJagerKompanie Part VIII - Finished

In case you missed some:
Schwere PanzerJagerKompanie Part I - Intro
Schwere PanzerJagerKompanie Part II - Preperation
Schwere PanzerJagerKompanie Part III - Airbrushing
Schwere PanzerJagerKompanie Part IV - Detailing
Schwere PanzerJagerKompanie Part V - Wash & Highlight
Schwere PanzerJagerKompanie Part VI - Decal Tutorial
Schwere PanzerJagerKompanie Part VII - Detailing...again? 
Schwere PanzerJagerKompanie Part VIII - Basing

Finally finished.

The final step for the gun teams and the next to last step for tank teams is Varnish.

As people get to know me around the Flames of War world they will here me say this may times.  I will NOT ever use an aerosol can on any of my models.

The formula for my final varnish, or dull coat as some call it, is;
  • 3 parts Tamiya Clear (X-22)
    • This gives it the greatest protection.  To thick to go through an airbrush by itself. 
  • 2 parts Tamiya Flat Base (X-21)
    • This makes the varnish matte.  This works better then any spray ever can. 
  • 5 parts Future Floor Polish
    • this gives it some more protection and makes it thinner to go through an airbrush with out using water or thinner. 
After a varnish, I will dirty the tanks up with some artist chalk.  I stopped doing this for a bit.  I used to do it before the varnish.  But the spray would make the 'dust' turn wet.  It wasn't as bad with the airbrush, but when I used to use aerosol can's it was really bad.  I wish for the life of me who told me this, could have been one of the WWPD guys, but I can't remember.  What he said was trying adding the 'dust' after the varnish.  I was always afraid of it coming off on your fingers, so I guess we'll see how that works out.

If you notice on the front of my BergePanther I put a chain.  In my head I thought this would be the coolest thing ever.  It turns out this was the biggest pain in my ass ever.  First I could get it to stay on.  It was impossible to paint all those little links.  I finally had to try and glut it a little, but then for some reason my glue turned totally white.  And in the end the glue still didn't keep it on.  I finally had to cover it up with some mud.  And the matte varnish helped tone it done some too.  Over all it didn't turn out to bad, but man it was a pain.  And it didn't turn out as well on the model as it did in my head.  Moding is not my strong suit that is for-sure.

The very last thing I do is put antenna's on.  I bought a broom head from the dollar store.
(ha ha...I said head!  I never said this was a family show).  You just snipe one off, cut it to the length you like and glue it on.  Then even curl really nicely if you don't like your antenna's straight.

The one thing I really have no idea about is how tall the antenna is suppose to be.  If anyone knows, I would love to hear from you.

There you go.  My army for the pairs tournament next week is finished.  Although...Shawn "the bastard", I mean "terrain guy" pointed out my list was wrong.  Not a good start for the Rules Nazi (episode 1 coming soon).  I originally was going to take Noaks panther and 2 jagedpanthers.  I had assumed (incorrectly) that noak replaced the HQ.  But as Shawn pointed out, Noak is a Battalion commander, and he is in addition to the Company Commander.  It doesn't really say that, but thinking about it, I think Shawn is correct.

Anyway, there you have it.  Enjoy.  Hope you enjoyed this and hope some people learned from it. I know I did. Always easier to learn from other peoples mistakes. I even learned a few things.

Always be Learning 

Saturday, April 16, 2011

Schwere PanzerJagerKompanie Part VIII - Basing

In case you missed some:
Schwere PanzerJagerKompanie Part I - Intro
Schwere PanzerJagerKompanie Part II - Preperation
Schwere PanzerJagerKompanie Part III - Airbrushing
Schwere PanzerJagerKompanie Part IV - Detailing
Schwere PanzerJagerKompanie Part V - Wash & Highlight
Schwere PanzerJagerKompanie Part VI - Decal Tutorial
Schwere PanzerJagerKompanie Part VII - Detailing...again?

Time to base.  I use a hobby foam putty that you can get from train stores.  This used to take me for ever.  It was so hard to get it to stick to the base.  But the foam becomes really softer with water.  Now, I just dip my putty knife in water and then take some foam.  It practically melts onto the base this way.  Base the whole thing so that you can't tell each individual guy is standing on a base.  I've seen far better paint jobs then mine ruined because you can still see each individual mans base.


The downfall to using foam putty is that you have to let it dry over night.  I tough chore for some...eh Luke? ;)

While I let those dry I can weather some other stuff.  This is something I'm not very good at.  I really like how my tanks look 'clean', but I don't like how unrealistic that looks.  So, I keep trying to weather.  The JagdPanther and Panther I will not weather here.  I like to give credit where credit is due but I can't, for the life of me, remember who told me this, but he said to try 'dusting' after the varnish.  So we'll see.

But, i'll muddy up the KV-1e and the BergePanther.  I paint using a muddy brown color in a sweeping motion in the direction mud would fling off the tracks.  Then I use a Tamiya mud stick to apply mud.  This is a very cool effect.  Mud I have no problem doing.

Now, back to the artillery teams.  I will paint the entire base Reaper Earth Brown.

Then dry-brush the whole thing with a 50/50 earth brown to white.

After that I had static grass, and voila done.  Unfortunately static grass in impossible to stand up.  Despite what people say.  I've tried all the tricks...TV, Balloon, blowing...nothing makes that stuff stand up.  Best I can do is put 2 coats on.


Good news is my good friend Shawn "the terrain guy" has turned me on to Silfors.  They are little tuffs of grass that are already standing up.  So, I'll get a much better effect with zero mess.  Because of his business in terrain, he has lots of these, and I'll pick some up from him next weekend at our pairs tournament.  

You can check out Shawns stuff the RHQ Terrain Studio section of my blog.

Thursday, April 14, 2011

Schwere PanzerJagerKompanie Part VII - Detailing...again?

In case you missed some:
Schwere PanzerJagerKompanie Part I - Intro
Schwere PanzerJagerKompanie Part II - Preperation
Schwere PanzerJagerKompanie Part III - Airbrushing
Schwere PanzerJagerKompanie Part IV - Detailing
Schwere PanzerJagerKompanie Part V - Wash & Highlight
Schwere PanzerJagerKompanie Part VI - Decal Tutorial

Yes, detailing again.  But this time I do all the detailing on the guns and vehicles.  Tow cables, tools, tracks and what ever other small details needs to be painted.

One of the more tedious jobs of this hobby is painting the road wheels on tanks.  I never used to do this because weathering just covered them up. But, several people on the forum suggested that a paint the road wheels.  So now I do.  Even though its a pain, they do look better painted.

One of the best parts of this hobby is research.  On the side of the 10.5cm guns are these red and white 'sticks'.  I always thought it was so stupid that these nicely camouflaged guns had these bright red and white sticks on it.  I had no idea what these were.  Even though I knew how to paint them, I like to know what I'm painting.  I thought I knew a lot about WWII before I started this hobby.  My knowledge has astronomically increased just from all the research of done.

So, I did some research as to what these were.  It was really hard to find anything on Google, because I had no idea what they were called.  You can't exactly Google "red and white stick thingies."  I even looked in an artillery book.  There was no mention of them in there.  I asked on the forum and finally got an answer.  Apparently the FoW community understands "red and white stick thingies".  These 'sticks' are sighting rods.  Teams would use them to measure the horizon so all guns could range in on the same target.  Like surveying equipment I suppose.


Another bit of research I needed to do was the inside of hatches.  I never used to bother with this kind of stuff, but the better and faster I get the more detailed I want to get.  What I found was that the inside of German tanks were a yellowish ivory color.  But the bottom inside was green grey.  So I painted the inside hatches with a mix of Dark yellow base colour and white.  I did the captured KV like this as well.  Even though I know they repainted their captured tanks German Grey, I have no idea if they would have done the inside too. So, I just assumed they did.  This could be wrong.

Tracks, if you've been following I base coat in a rust brown.  At this point I will do a heavy dry brush of black.  Then a lighter drybrush of gunmetal.

This is how shitty my town is for FoW.  I couldn't find black hobby paint if my life deepened on it.  I tried the tamiya black I use in my airbrush, but it was way to light.  I would have had to do 20 coats.  No one here has the FoW paints.  I had bought the last Vallejo in the city, and of course it was totally dried out.  Man, this city sucks.   

Anyway, the other thing I do at this point is paint windows.  This always seems to be a crap shoot.  I've tried many different things.  Some times they look good sometimes they don't.  But I may have found something I like.  I applied 2 really watered down shades of gray over top of each other.  and they a realy watered down sky blue just on the top part of the window.  I think it turned out pretty well.  Almost looks like you can see the horizon in the window.

Anyway...next will be weathering, which will include basing the gun teams.


Friday, April 8, 2011

Aircraft & Cover - Can Phil be Wrong? Part II

In someone else trying to defend the Phil ruling...

Admiral states
'As the rule is written the only way to read the rule which doesn't assume text which is absent leads to the ruling which Phil has made.' 

This was my response.  I had a bit of a revaluation, that will hopefully blow this wide open.

I really can't see how knowing what we know.

I could see this point of view if you simply plopped your aircraft down on the table. But you don't.

How do you 'know' where to place your aircraft? How do you 'know' which way to place your trailing aircraft?

...a direction of travel...The very thing everyone says isn't in the rule. Therefore "Far Side Of" implies a direction of travel for the simple fact I don't just plop my airplane on the table.

As I mentioned in my blog you might as well just let people put airplanes any where. Then I could see phils ruling making sense.

Now 'knowing' that, no where in that rule, in that entire rule book does it mention that the woods has to be between aircraft and the target...it simply says 'within 4"...get cover' end of story.

NOW THINK OF IT THIS WAY!

What if a unit is partial in the woods, and the aircraft comes from the front...well this situation the woods still isn't between the unit and the plane...so no cover. Even though the unit is 'IN' the woods.

According to the way you guys interpret the ruling and pull 'between' out of thin air, this is no cover either.

Why on earth would you not get cover from aircraft, but you would from other vehicles this way?

Its not consistent your way. 

This is no cover either Camp A...can't have it both ways.
So the way I see it they can't have the best of both worlds.  The rule does say 'IN OR WITHIN 4' and with them pulling 'between' out of their butts...

Their way, if you are on the edge of a woods, you don't get cover from aircraft, even though you would from any other weapon in the game. 

They will either argue this point...and now they are assuming.
Or...
They will agree making the rule inconsistent their way.

Its a win/win for Camp B...but was there really any doubt?

Thursday, April 7, 2011

Aircraft & Cover - Can Phil be Wrong?

Phil's ruling...this is no cover.  Really?
Can I dare say the 'boss' is wrong?  Well, maybe not wrong, but I'd have to say he's mistaken or has forgotten the original meaning. What I'm referring to is Aircraft and cover. There was a huge discussion on the BF forum about it here;
http://www.flamesofwar.com/Default.aspx?tabid=126&aff=3&aft=513137&afv=topic

I recently just listened to WWPD podcast Episode 14, and they say they received an e-mail from Phil about the correct ruling.  Even though this comes from the creator I still have to strongly disagree.

The Rule
Teams in, or on the far side of and within 4"/10cm of, woods or buildings are Concealed to aircraft.


There are two interpretations of this rule.  Even though I can't, for the life of me, comprehend why.

Camp A (Phil's ruling, and the wrong camp)
The woods or building has to be between the aircraft and target at the time of shooting, in order to get cover.  So, if the aircraft can fit inside that 4", the team gets no cover.

No cover from a dive bomber?  Really guys?
The #1 reason this is the wrong ruling
is because the rule doesn't say, "woods or buildings between the aircraft and target".  There would be zero reason to say "far side" if this is how the rule was suppose to work.

I don't even see much of a reason for 'direction of travel' if this is the way the rule was meant to be.  You might as well just let people put aircraft where you want with in 6" of a target.

The other reason, not that this game is realistic, but for a dive bomber trajectory, this makes absolutely no sense.  A bomber would have to dive at a 90 degree angle to make this attack work.  And a bomber with rockets or guns would NEVER dive at this angle.  I think only the Stuka even came close to this dive angle.

What happens if 2 of the 3 planes end up in the forest?  does only the lead plane count?  Or does the lead bomber let his buddies crash into the woods just so the target team doesn't get any cover?  If the target has cover from 2 of the 3 planes why wouldn't the team get cover?  You already have rules where the number of planes matter.  So why would you get no cover from aircraft if 2 of the 3 are in the woods and not in the 4" space between the plane and the unit?

The other 'excuse' camp A makes is intervening friendly troops can cause your aircraft to push into the woods and then you would get cover.  To me this is a reading to much into the rule cop out.  Especially if the target is 3.9" away from the woods.  The slight chance that you can't get your aircraft in there, where there isn't intervening friendly's, you'd probably just choose another target.  More often then not you aren't going to take a chance on your units being that close...especially if you want to move them.  I'm not saying this can't happen, but using this as a reason why camp A is correct is total garbage.

Camp B (The right camp)
The cover is based on the direction of travel of the aircraft.  If a team is on the far side of woods or buildings, and within 4" they get cover no matter where the aircraft is placed.

The #1 reason this is the correct ruling
All the rule says is;
Teams in, or on the far side of and within 4"/10cm of, woods or buildings are Concealed to aircraft.  There are no if's, buts, exceptions, or conditions to the rule.  If you are using aircraft and your target is on the far side of and within 4"/10cm of, woods or buildings....they are concealed.  End of rule.  It seems very clear to me.  The other camp never say it seems very clear.  They always say "I see how that can be misinterpreted.  But, I really can't see how.  I think they are reading way to much into it.

Again, not that this game is trying to be realistic, but think of the trajectory of a bomb.  Unless the bomb came down at a 90 degree angle, it would hit the building or the woods before it hit the target.  And because its a bomb, the target would still take damage, but because it wouldn't be a direct hit, the target gets cover.

Stuka's had a trajectory of 60-90 degrees.  The Stuka might be the only plane that could pull it off.  Shturmovik only attacked at 30 degree's as did most other dive bombers with guns and rockets.  The 'camp B' ruling resolves this 'realism' issue.

Look at 'point 3' in the picture to the right.  This is even at a 90 degree angle dive.  The direction of the bomb still doesn't travel straight down.  And as I said, no way aircraft with rockets or strafing machine guns dive at this angle.

Its simple physics people.  Don't make me pull out the equation....because I found it.   

Conclusion
With the camp B ruling, there are no arguments about realism or goofy game play situations.  If you attack with aircraft, your target is on the far side of and within 4"/10cm of, woods or buildings....they are concealed...end of story. 

Maybe in version 3, Phil could add some special rules to include both camps.  Maybe Stuka's or even aircraft using bombs could ignore this 4" cover rule.  But aircraft using guns and rockets, the target would still get cover....based on direction of travel.

Unfortunately I'm not as articulate on paper as I sound in my own head, so hopefully this all makes sense.
All this over a +1 to hit...sheesh! 

Tuesday, April 5, 2011

Schwere PanzerJagerKompanie Part VI - Decal Tutorial

In case you missed some:
Schwere PanzerJagerKompanie Part I - Intro
Schwere PanzerJagerKompanie Part II - Preperation
Schwere PanzerJagerKompanie Part III - Airbrushing
Schwere PanzerJagerKompanie Part IV - Detailing
Schwere PanzerJagerKompanie Part V - Wash & Highlight

Well, getting near the end of this little adventure.  One of the few things I have become good at is decals.  I've seen paint jobs far superior to mine totally ruined by poor decals.  Even looking at the JagdPanthers in Earth & Steel pictures, they are riddled with 'silvered' decals.

I always said I should do a full blown tutorial of how to do decals, and I figure this is as good a time as any.

First lets start with what you will need;
  • Micro Set
  • Micro Sol
  • Gloss Varnish
  • Pin
  • Hobby Knife
  • Fine Paint Brush
  • Tweezers
  • Warm Water
  • Decals
Yes you will need both Micro Set and Micro Sol.  I have never seen any one else use both.  I have tried just Micro Set, and I have tried just Micro Sol.  Each alone doesn't really work that well.  There is a reason they make both.  Especially if you are doing vehicles with Zimmerit.

Step 1
You will need to cut out your decals.  If you shine your decal sheet in the light you can see the edges of each decal.  Be careful not to cut your decal.

Although some times you can cut the edges so that the decal will fit better.  Its not so bad now but with the older decals, there was a lot of 'extra edge' to the decal.  You could really shave them down.  German crosses used to be a single square piece.  Now they are better and are more uniform to the cross.

When you are cutting your decal, make sure you leave them with some paper out side the edge of the decal.  You don't want to actually be grabbing the decal with your tweezers when it slides off.

Now plan where each decal will go and how it will fit.


Step 2
Brush the area you planned for your decals with a gloss varnish.  I use Tamiya X-22 Clear.  Make sure you have done a full gloss varnish, or at the very least a wash, over the whole vehicle before doing decals.  If you don't you'll find that the brush on varnish and Micro Set will rub off your paint.

Do a bunch of vehicles at the same time to give the varnish time to dry.  For this tutorial I did about 10 vehicles.  The first one was dry by the time I glossed all the decal spots.


Step 3
Now you want to put all the decals for one vehicle into your warm water.  Don't put to many decals in your water.  If they are in the water too long the decal will slide off the paper and you'll have a hell of a time trying to get it onto your vehicle.

And yes you for sure want to use warm water.  I find I change my water every couple of vehicles.  As soon as the water is no longer warm to the touch.  If the water is cold, you will wait forever for the decal to slide off the paper.


Step 4
Use your fine brush to see if the decal will slide on the paper in the water.  If it does its ready.  To start this step I have my fine brush in one hand and my tweezers in the other.

Grab the decal with the paper being careful not to grab the decal.  Keep your decal parallel to surface of the water as you lift it out.  If its been in the water to long and you lift it out perpendicular to the water surface the decal will slide right off.

Once you have a hold of the decal and its out of the water, touch the bottom of it to some paper towel.  This will suck some of the excess water from the decal.


Step 5
This is where you will need Micro Set.  Make sure you don't mix up using Micro Set and Micro Sol, it will make a difference.

Dip your brush into the Micro Set.  I usually pour some into the cap.

I try to put something under one side of the vehicle so i can easily slide the decal into position


Using the brush, slide the decal onto the vehicle.  It doesn't matter if it goes on straight.  Just as long as it goes on to the spot where you brushed the gloss varnish on.

Dip your brush back into the Micro Set.  With the brush position the decal where you want it.  At the same time make sure you brush the entire decal with Micro Set.

What Micro Set does is make the decals glue more adhesive.

Step 6
Using a Q-Tip gentle press the decal against the surface of the vehicle.  Be careful, the decal could still slide around.  The Q-tip will soak up any excess water and Micro Set, so that the decal will stick to the vehicle.


Step 7
Now, repeat steps 4-6 for the other decals on the same vehicle.
And then repeat steps 4-7 for the rest of the vehicles you are doing.

Step 8
Going back to your first vehicle, check the decals for silvering.  Its ok if they do.  Most likely at this point your decal will only silver if placing it on zimmerit or on an odd surface.  This is the case when putting a 3 digit number on say a panzer III turret.  There isn't a big enough flat surface for the whole decal.


If you do find some silvering, take you pin and gently poke a hole in your decal.  I like to poke around and in between the numbers.  I don't usually poke the actually "paint" of the decal unless its black.  Be very very careful when doing this.  You can wreck your paint if you poke to hard.

Zimmerit is great for this because you can poke into the zimmerit.


Step 9
Now, take your Micro Sol and brush it into your decal.  Even if your decal had no silvering and you didn't need to poke your holes, I will still brush it on the decal.

If it did have silvering you should see the decal soak it up.

What Micro Sol does is make your decal soft so it will conform to irregular surfaces.  It doesn't matter if its zimmerit or uneven resin. 


Take a small piece of paper towel and gently press the decal into the surface of the vehicle.  You can't use the q-tip for this because Micro Sol makes the decal sticky.  You'll find little fibers from the q-tip will stick  to your decal.

As you press, you can see the decal conform to the surface.  I'm still amazed how well this works.


You can see in the pics below there is no more silvering. 


Step 10
Go back and repeat steps 8-9 for the rest of your vehicles.

Completion
There you now have perfect decals even on zimmerit.

Don't worry if your decals are still shinny and you can see the edges.  This will disappear when you do a matt varnish.  I even spray a little extra where the decals are.

Some people like to do a gloss varnish after they are done the decal.  I don't do this.  I don't see a point.  My matt varnish will seal them.

You may notice I also do my wash and highlight before I do decals.  I think a lot of people do this after decals.  I find some decals are thicker then others.  Mostly the older Soviet stars.  And the decal edges will get picked up by the highlight and wash.

You can still do weathering to dirty up the decals.  So, no need to do a wash and highlight after the decal.  Safer to just do it before.

There you go.  Hopefully this will help some people do better decals.  The key is using both Micro Sol, and Micro Set.

Here are the rest of the vehicles for this project.  Not a single bit of silvering, and all conform to the zimmerit.